Статическая ячейка код старбаунд


Первое, что вам предложат сделать, это создать персонажа.
Открывается меню кастомизации персонажа:
Фазу обучения можно пропустить, поставив галочку на «Пропустить вступительную миссию» (Skip intro mission).
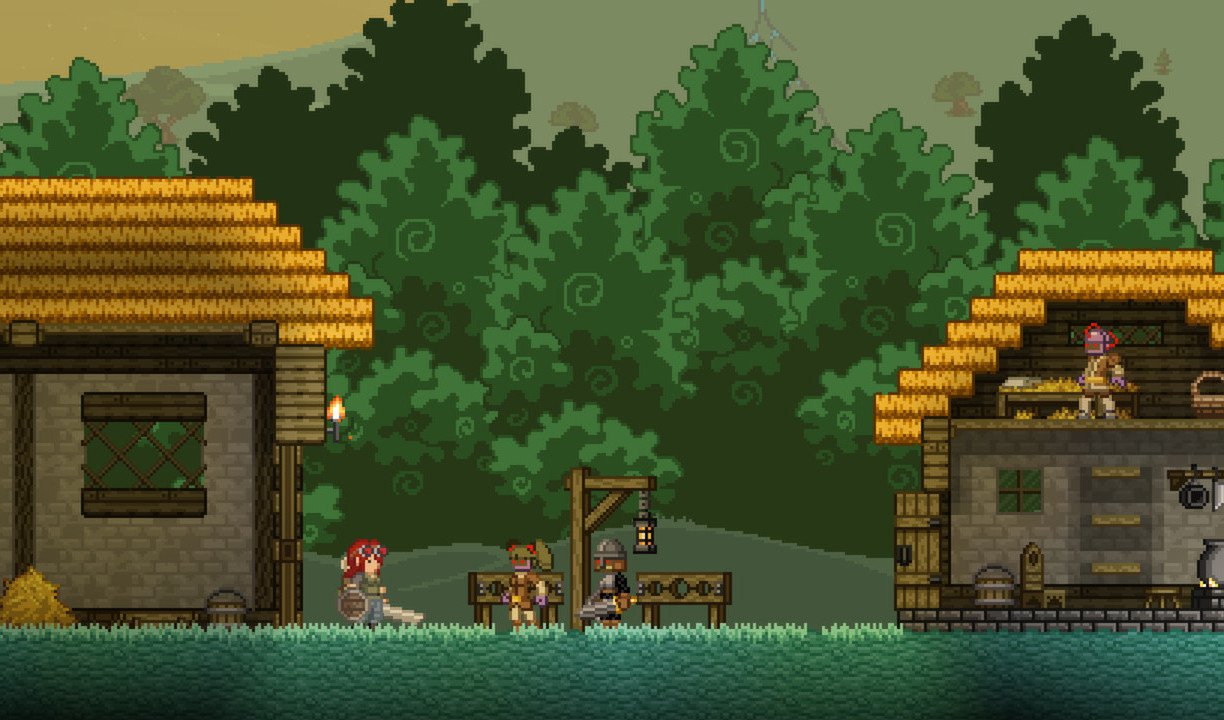
После создания персонажа вы оказываетесь в кровати на некой базе, вас будит обучающий ИИ.
«Проснитесь. Вы проспали.»
«Доброе утро выпускник! Вы проспали. Нажмите A или D чтобы встать с кровати.»
«Для взаимодействия с ближайшим субъектом, дверью, или другими объектами, вам нужно навести курсор и нажать Е, если вы достаточно проснулись для этого.»
«Ваша форма доступна в вашем персональном ящике. Это весьма впечатляет, что вы можете оставаться такими безмятежными, когда опаздываете. Молодцы вы.»
«Мои товарищи Защитники. Сегодня бы собрались, чтобы стать свидетелями роста Протектората. Вот уже на протяжении 500 лет, здесь на Земле, мы сводим вместе расы разных видов во имя мира. Наша задача: Защищать наших товарищей, для поддержки дома. И обучать тех, кто ищет нашей помощь. И содействовать согласию между теми, которые стремятся к этому.
Сегодня, во имя мира, мы приветствуем наших новых соотечественников и дарим каждому по нашему величайшему инструменту. это Манипулятор Материй!
Хм? Что это было? Чт- Что за.
Ты, Выпускник! Хватай Манипулятор и беги! Отправляйся в безопасное место!»
Далее заботливый ИИ просит взять манипулятор материй (Matter Manipulator) и бежать к шаттлу.
Теперь вы можете собирать блоки и объекты. Кнопка R позволяет выбрать режим кирки.
Двигаемся дальше.
Потолок обвалился, это ваша первое возможность опробовать манипулятор! Наводим манипулятором на блоки земли, зажимаем ЛКМ для сбора блоков.
Зажимая Shift можно убирать или ставить по одному блоку,а не по 4 сразу.
C помощью Spacebar забираемся на вверх, S + Spacebar спускаемся вниз.
Преодолеваем очередное ограждение из земли. Доходим до сундука.
Мешочек с наградой (Reward Bag).
Перед спуском на планету, подойдите к настенному шкафчику и заберите заначку.
Подходим к телепорту и ждем Е.
В появившемся окне выбираем место и жмем «Телепортироваться» (Teleport).
Теперь ваша главная задача выжить.
Рекомендую поставить какой-нибудь ориентир на старте, так вы будете знать когда сделаете круг.
Путешествие дело опасное и с голыми руками вы долго не протяните.
Нажмите C или гаечный ключик в правом верхнем углу. Это откроет меню крафта.
Для простого забега вокруг планеты этого вполне хватит. Рекомендую сперва сделать кружок, заодно узнаете чем богаты. Более продвинутый крафт и обустройство корабля будет ниже.
Все планеты круглые, вы в конечном итоге сделаете круг, так что выбор в какую сторону бежать не имеет особого значения.
Рекомендую носить одну с собой, а вторую поставить на корабле.
Эта же тактика поможет вам выжить на планетах более высокого уровня.
Телепорт на корабль работает только до определенной глубины. И всегда на поверхности планеты. Также телепортации мешают задние стены, для этого достаточно убрать несколько блоков ПКМ манипулятором.
Этот прием может спасти вам жизнь, но так вы можете пропустить важные ресурсы.
Продолжайте путешествие. Вскоре вы найдете вход в шахту.
Ваш дружелюбный ИИ уловил различные признаки жизни в этой шахте. И рекомендует сперва вооружится.
Чем глубже вы спускаетесь, тем опаснее мобы.
Поэтому рекомендуется вернуться на корабль и заняться обустройством.
Новое оборудование для крафта позволит получить максимально полезный шмот на этом этапе.
Для телепорта на корабль выйдите на улицу и нажмите на стрелочку вверх в правом верхнем углу. (Или уберите часть стен на том месте где стоите.)
Нажимаем на Стол изобретателя (Inventor’s Table) и крафтим всего по штуке.
Еда теперь важный ресурс. По дороге теперь можно набрать мяса.
Мясо это хорошо, но также полезно иметь небольшую ферму под носом.
Медная руда:
Готовим платформу, вспахиваем и увлажняем землю, сажаем семена.
На планете землю увлажняет дождь, но иногда придется поливать лейкой. На корабле в вашем распоряжении только лейки (На данном этапе).
На корабле советую посадить картошку и хлопковые кусты.
Давным-давно, была сила известная как Культиватор, это сохраняло равновесие во Вселенной. Под его влиянием, царила гармония. Так было эонами. Но это спокойствие кончилось.
Возникло существо, ненависти и разрушения. Это был Руин. Руин не переносил ни единой формы жизни и пожинал разрушения по всей вселенной. Он стремился уничтожить все живое и преуспел бы в этом, если бы не Культиватор. Культиватор восстал против Руина, и ему удалось прогнать его. Но какой ценой, Культиватор полностью израсходовал всю свою силу. Перед тем как его последние остатки энергии рассеялись, Культиватор подарил шести избранным расам по драгоценному артефакту. Эти шесть артефактов, когда объединены, формируют ключ, который открывает врата к Руину.
Оборона рушиться. Мы должны объединить артефакты, настигнуть Руина, и уничтожить его. Тут есть над чем подумать, дорогой. И это большая просьба. Но мне бы пригодилась твоя помощь. Артефакты разбросаны среди звезд, я не могу нейти их в одиночку. Мы должны найти их и уничтожить Руина, пока другие планеты не пошли по пути Земли.»
После заставки еще раз жмем на Эстер и сдаем квест.
Starbound: Основные Команды [Ver 2.0]
/help Показывает Список Команд
/help «название Команды» отображает помощь по написанной команде (пример /help spawnitem)
/admin делает Бесмертным дает бесплатный крафт и Бесконечную Энергию а Также Дает Доступ К Следующим Командам
/naked Раздевает Персонажа
/itemid показывает айди предмета на который наВеден Курсор
/spawnnpc Создает нпс (Смотрите Список Нпс в Конце)
/spawnitem спавнит Вещь (название писать без пробела пример /spawnitem goldbar) (При Ошыбке в Названии придмета спавнит Зеленую Коробочку»Perfectly Generic Item»)
/spawnmonster спавнит монстра (список Монстров в конце)
/spawnliquid спавнит Жидкость ( список Жидкости в Конце)
/Gravity Показывает текущщий Уровень Гравитации
/setgravity ставит гравитацию на написанный уровень
/resetgravity Отменяет Изменения с Гравитацией
/coordinate Показывает Кардинаты планеты на которой Вы Находитесь
( ладно приступим к Списку Жидкостей)
healingliquid- целебная Вода
liquid erchius fuel (Топливо) (Чтобы Заспавнить пишем Fuel)
(приступим к Сложному и Долгому Списку Монстров)
(Ixodoom его лутше бы не спавнить)
(1 Написаное Название 2 Что нужно Писать при Спавне)
robotboss- бос Мех Пингвиненка с Мех Арены
(и как В Прошлый Раз я Упомянул)
(Для сервера в настройках нужно прописать»allowAdminCommands» : true в файле starbound.config в папке Starbound/giraffe_storage/. Также нужно поменять строку «allowAdminCommandsFromAnyone» с false на true).
( и (Команды работают не на всех Версиях)
(ну вот и все Важные Команды Закидывайте Тапками и Критикуйте ))
Статическая ячейка код старбаунд

Содержание
Механика защиты
Щит имеет запас прочности, который способен самостоятельно восстанавливаться. По его истечении щит окажется пробитым и не сможет защитить вас от входящего урона. Кроме того, щит действует только на атаки в лоб, атака со спины пройдёт в полную силу. Если щит блокирует атаку накладывающую эффект(горение, отравление и т.п.), то урон самой атаки будет блокирован, но эффект будет наложен в любом случае. Количество запаса прочности щита зависит от уровня планеты, на которой щит был найден. Также повреждения, которые получает щит, зависят от уровня существ(они различны на различных планетах). Так существа низкого уровня практически не наносят урона щиту, найденному на планете высокого уровня.
Также коэффициент защиты щита зависит от брони. т.е. получаемый урон сначала обрезается бронёй, а потом уже идёт на щит. Потому чтобы стать настоящим «танком» носите броню с максимальной защитой помимо щита.
Разновидность щитов
Подвиды щитов
Все встречаемые в игре щиты можно разделить на 2 группы:
Уникальные
Уникальные щиты имеют строго фиксированные характеристики, привязанные к названию и внешнему виду. На данный момент таких щитов в игре очень мало. Их можно создать на наковальне и прочих рабочих местах.
Процедурно генерируемые

Все виды щитов. Разделение на «малые», «средние» и «тяжёлые».
Все найденные щиты генерируются случайным образом с именами, построенными через префиксы и суффиксы. Они имеют различный внешний вид и количество блокируемого урона, которое зависит от уровня сложности локации, на которой его нашли.
Предыдущие версии
До зимнего обновления от 3 февраля, щит при использовании блокирует восстановление энергии. Процент поглощаемого щитом урона зависит от уровня щита.
Читы и консольные команды для Starbound
Starbound может с первого взгляда напомнить Terraria, но глубинно это совершенно разные игры. Оказавшись после разрушения родной планете в новом мире, игроку предстоит в коопе или в одиночку отсроить опорный пункт базы и начать своё путешествие, выполненное в квестовых линиях.
Планеты, исследуемые игроками, процедурно генерируются и имеют свои отличия, в частности растительностью, циклами суток, гравитацией, существами и так далее. И конечно же, в такой игре не обшлось без консольных команд. О них ниже:
Команды пишутся в чате, в начале указывается знак / с последующим словом.
Стоит отметить, что большая часть команд в игре предусмотрено для тестирования ошибок игры бета-тестерами и игроками. Поэтому в гайд их включать не будем, поскольку они совершенно бесполезны.
/help — отобразить список всех команд. Команда хороша тем, что позволит ознакомится с актуальным списком работающих команд;
/admin — режим Бога, знание всех рецептов, крафт без материалов. Добавим, что без этой команды остальные могут не работать;
/pvp — включает режим PvP;
/Gravity — отобразить уровень гравитации. По умолчанию 80;
/setgravity X — установить желаемую гравитацию. Отрицательные значения будут поднимать вас в воздух;
/resetgravity — установить гравитацию по умолчанию;
/naked — снять всю экипировку;
/itemid — отобразить ID выбранного предмета;
/spawnitem — после того как узнаете ID предмета по команде выше, вы можете его спавнить этой командой, введя его ID. Например /spawnitem bonusarmorchest;
/suicide — суицид;
/setspawnpoint — установить респаун игрока на месте курсора. Ни в коем случае респаун не должен быть на месте блоков;
/coordinate — отобразить координаты где Вы находитесь.
Статическая ячейка код старбаунд


Okay, first things first.
This is my first guide over Steam, and as such, I know basicly nothing of how this works.
This guide is meant to improve and clarify about all that is necessary about the «/spawnitem» command for Starbound.
It will be FAR from complete. I am sorry, but the information is scattered through the internet right now. And it make it hard to piece things together as all the information might not be true anymore.
Also, people with either low sense of humor or high sensivity might want to avoid this guide. I have my own way of humouring myself, and you have yours. If you don’t like my jokes, s’all fine, just don’t complain in the end.
Without further addo, lets get started.
As the name very well implies, it serves to spawn items.
For those who already used it, you may skip this part, as I will first explain how-to for those who never did.
After all that, you are free to start using all commands avalible.
All you need besides the command is the item that you want.
Before you start typing in the names of the items after the command and going like «Why doesn’t this work?», let me tell you, that every item has an ID, not unlike your personal ID card.
What ID, you may ask? Well. it’s complicated. You see, not all items names have to do with their IDs. And, to be honest, there are far too many items for me to post the IDs for each one.
Luckily, there’s a database that is dedicated specificaly to store all Strabound items IDs: https://starbounditems.com/
Another fair warning, is that you might need to experiment key words in order to find the item you want. For example, you like the Scientist Glasses for your character. If you don’t find it with «Scientist» or «Glasses», you might want to expirement to use «apex», which is the race that uses them.
This doesn’t actually hold true for this specific case, but I’m warning that you might not find them through the name.
One final word of advice for the database while you’re searching. Any name that you imput is going to be searched in both the ID, the item Name and the Description of the item. So, you might not remember neither the ID nor the Name, but you could search through its Description.
/spawnitem woodenbed 2
Just don’t tell her that there are two versions of that bed, or you’ll find yourself requiring to use that command to spawn two different beds which will also require two diferent item IDs.
You are now officially ready for the complicated stuff.
Okay, I know this was suposed to be simple, but you guys will quickly find yourselves deep down on the internet again in search for «How the hell do I get a riffle with this element and this power?», and to that I say HOOOOOOOOOOLD your horses.
One thing you must learn right now if you want to do that, is that the Starbound items, specificaly shields and weapons, are randomly (procedurally) generated, just like the planets.
By that I mean that there are only a bunch (around 30) of specific weapons. Those you generaly get from NPC drops or in chests don’t in fact exist inside the game, and are instead a couple of sprites and powers put together on the moment of creation.
How then, must you be asking, can I get a specific weapon if they are randomly generated? Fear not, my dear reader. For all random generations there is a seed (number) that they are based upon. But, I doubt you guys have the quadrillion or more years required to check one and all possible seeds.
And so, here I am, getting off track like a high-speedster with a Ferrari in the highway. But in all seriousness, what you want is parameters for your items, and it is here, my friends, my developers, that things finaly get utterly ugly.
One would often have easy access on how to imput such information in order to get the most overpowered weapon or armor, but it seems like Chucklefish industries prefer to go the hard way, and honestly, I can’t blame them.
I don’t know how their engine looks like since I never opened the game’s hood (if you get my meaning), to see how the pieces glue together, but if they complicated stuff they must have had a reason.
Items have a bunch of paramets. From damage, to damage multiplier, damage per second, energy cost, bullet type, but in the end, it all comes down to know the names of each parameter and how to set the amount for them.
Two parameters that you might want to get a hold and note down right now is the «level» and the «seed». These are useful for a bunch of reasons, but they’re mostly needed to help you keep a tier and apearance you want for the weapon.
Although both of them are useless on anything that are not weapons.
Let’s deal with rifles this time, something to protect you from your overly attached girlfriend.
If you search on the database for «rifle» you’ll find out that there are a handfull of actual weapons and the rest is pretty much randomly generated.
For this case, we’ll settle for an uncommon assault rifle, whose ID is pretty much self explanatory as «uncommonassaultrifle».
If you spawn an item with this ID, it will simply create a random assault rifle out of all possibilities. It is also possible, though I never got confirmation, that the tier of the weapon can depend in which star system you are in. Fiery stars would give tier 4/5 rifles, while gentle stars would give tier 1/2 rifles.
However, we don’t want a random assault rifle but a more specific one.
Okay, so, since you now know a bit more, let’s try step by step.
Try each of the following:
/spawnitem uncommonassaultrifle 1
/spawnitem uncommonassaultrifle 1 ‘<"level":3>‘
/spawnitem uncommonassaultrifle 1 ‘<"seed":25>‘
/spawnitem uncommonassaultrifle 1 ‘<"level":3,"seed":25>‘
Now, if you try to repeat the third one, you’ll understand that you should, in theory, always get the same weapon with the same stats (which MAY vary due the tier of the system, but in essence, it’ll always be the same weapon), which I assume should be something like this:
I was in a Gentle star when I created that. So, the damage is pretty low. If you are in a higher tier and the stats are considerably better, it’s because of what I said about the weapon becoming a higher tier, but it should still be of green quality and of that apearace, with those same bullets and same ability.
However! The «level» parameter will set an item’s tier to that number. So, if you repeat the 4th spawned item, no matter where you are, you’ll always get a tier 3 uncommon assault rifle with that apearance, those bullets and that secondary ability.
So, «level» binds the tier and can be any integer number. I never tried more than level 10, so I’ll leave to you guys to test it out.
Keep in mind that the current max tier in the game, without the access of the commands, is 6.
And «seed» binds everything else from that specific number.
Now that you’ve dealt with basic parameters, let me tell you that you change basiclly anything on a weapon. Yes, as silly as it sounds, you can make a ranged weapon function as a melee weapon, although I’d not recommend it because it’s not only hard, it can also crash your game and/or make that character permanently unplayable. (That only happened to me once, still not good though.)
Now, lets try to change the weapon secundary ability.
I’m not going to lie, finding such information was hard, because nobody can either comprehend the new assets system or it’s simply too messy.
And now, you should have something like this:
If you’re getting an error in chat like «Could not parse item parameters», it’s because you’re writing something wrong. Trust me, I know this WAAAAAY too well.
If not, congratulations, you can now keep your clingy girlfriend away from you.
But we’re not stopping here, oooh no my dear friends.
Next we’ll change the element of the weapon. While I personaly prefer Electric, a clingy AND electrified girlfriend isn’t a good idea. But fire is bad too, she’ll get too hot and you won’t be able to resist.
No, we’re going for the only suitable thing: Poison. Why? Because if you keep her away for so long, she’ll surely turn into a slithering snake. Migh as well give her the poison right away.
So, to change the element, we add the following: «elementalType»:»poison»
This simple command is slowly starting to get messy as you can notice:
Once again, success:
Notice that the bullets and energy lance automaticaly changed the colour to fit the element too.
Please, also note that I can’t do much about the parameters going onto the next line. It’s the way text formating works, but for as long as you don’t break lines with an Enter, you should be fine.
I never said this was going to be easy anyway, nor is any good girlfriend, so we’re still down for more.
We will now add a small little something to make this weapon fully personal.
And nothing better than giving it a name. And as such, let me demonstrate: «shortdescription»:»Girlfriend Pusher»
Now, lets add that to the rest:
There we go, feels much more personal, doesn’t it:
With those things due, there’s only one thing that doesn’t seem to fit. AH, right! The rarity.
You see, while we’re spawning an uncommon rifle, doesn’t mean it needs to be uncommon. After all, we’re going DEEEEEEEP into this matter, so we’ll stop at nothing!
A wise man once said. «With great power, comes great responsability.» Well, I don’t know about that, but what I learned with videogames is that «With great rarity comes great power.» And as such, a tier 3 weapon won’t fit our little legend here.
Lets change the «level» to 10, and lets alter the rarity with: «rarity»:»legendary»
Plus, I think the base damage is still not enough, so lets crank that up to eleven!
Phew, okay. That is a one big Diiiiiiiiiiiiiiiiiiiiiiiiiiiiiiiiiiiiiisorienting parsing line. Your girlfriend might even get jelous.
I know some of the numbers seem a bit big or a bit too small, but pay close mind that the DPS is kinda divided by a certain factorand firerate in ways I am yet to test out.
Now, here how the whole thing should look like, with level 10, Legendary rarity and primary attack parameters:
You now start to understand why this gets messier and messier. I’m sure it beats having intercourse with your girlfriend though, so I get ya. But here how it looks like now:
Deeem boi, leok ovah toase sick nuambes!
I don’t know about you guys, but my computer can’t handle that fire rate. Can just be because it is a burstfire, but what do I know?
Remember, copy&pasting this won’t work as I had to break the lines in order for Steam to show all the text.
And that’s pretty much it for most of the gun stats, folks! You guys are ready for the next level of parameters, so lets jump towards more complicated stuff!
Okay, so we’ve been through a lot, and there’s quite the bunch more that exists, but with all sincerity, I can’t care to put them all in a single gun.. besides, there’s only a limit of characters that Starbound text box can handle at a time, and we don’t want to reach that.
Yeah, I Roleplay in Starbound, problems?
But hey! At least one last thing for our neat gun right? And what is that? Colouring of course!
If you think things were bad until here, wait until we start going into hexadecimal and unpacking files and, OH MY GOD THIS LIST NEVER ENDS, checking for item sprites so you can see what exact colour hexes they’re using as base and. ♥♥♥♥♥♥♥♥, I’ll just jump into action.
And then I crush all your hopes by saying «NYAHAHAHA! You fell for my trap mortal!», you can’t actually colour guns the same way you can colour armors (which I’ll talk about later). So instead, you’ll need to change the seed.
Yep. That’s right. Change the seed until you find a weapon apearance you like. Or that your girlfriend will be jelous about, that’s would teach her. Go crazy though, big numbers, small numbers. See what you can do.
You guys nevermind all that! I’ve just figured out how to colour them, and oooh boy, this is some high level stuff. Vegeta would be proud.
So, in order to colour the gun we need two major things: The weapons parts and the original colours.
This is so because we will be working with a «replace» parameters, in which you need to know the original in order to be able to change it.
Getting to the orignial wasn’t throughly hard, although it took a while to unpack every game asset in order to be able to access the sprites.
(I have no idea why Steam makes those paths into an hiperlink. I tried to use the [NoParse] option, but it still does the same. Oh well.)
Yay! The weapon is now fully costumized and coloured. Just need to add that to the rest, prepare your body.
Okay, you know what, lets stop the jokes for a moment and look at that code. No, seriously, take a pause, and read through it all and see if you can understand EVERYTHING that’s in there.
Once you’re done reading through, spawn your rifle. Two things you need to have in consideration now. The sprites in the icon do not change. The colours in the icon sprites do not change.
I am yet to understand why this is so, but I belive it has to do with a generation for the icon as well. Therefore, if you wanted to change the icon, you’d need to to all that again for the icon, which I still don’t know how.
Here’s an image of how it looks ingame:
That’s it for the guns though. There are indeed more paramters, but as I mentioned earlier, I’ll add a list in the end of the guide, along with paths for the assets.
We’ve been through a long and thin bridge. We can barely fit together in it, space is scarce, and I feel like a wrong step can ruin the whole thing. Which isn’t far from truth.
Yet, that gun was manageble, and we need to move on.
Before getting any futher, I want to show you guys something:
As ye can kindly see, an armor that already has stats will have the added ones overlapping the text. However, not all is lost, because you can add stats to clothes too! Any cloth, in fact.
But, we want an armor, and it’s not like your girlfriend is going have access to your inventory, so we can make a powerfull one with overlapping effects no worries.
With what you guys learned thus far, you could probably go on your own.
Asside from the lack of knowledge on the effects themselves or the names of the parameters, I belive this explanation has been better suited than anything I found on the internet thus far, but this Guide is my own point of view on the matter.
Spawning armor with stats is not at all complicated, and perhaps a walk in the park after dealing with that pesky gun parameters.
So, without explaining as much as I was before, let’s get down to business.
We want a human’s Scouter’s armor for our Anti-Girlfriend brigade, both because of awsomeness, and because that Vegeta’s Scouter in the helmet is gona come useful to know where a low power human is nearby (AKA, your girlfriend).
I’d say that making these god items would be too much, but when it comes down to relationships, I’ve learned that it’s best not taking chances, specially that I often forget some girls are waaay more powerfull than me. I’m looking at you, Illaoi.
How about we make each piece give 100 HP, 100 Armor, 100 Energy and 400% increased damage? Sounds good enough? I like the idea. Lets go.
Using the above parameter, we can easly reach these stats:
There you can see that we used the [] to diferenciate the < >from each stat that requires multiple variables. Since you need to point out each stat first, this keeps things running.
Yet, I would mess up otherwise, so lets not play with that.
That was simple enough, I’d say. Now, the item IDs for each one: humantier1head, humantier1chest and humantier1pants.
Having those, you can start creating your template:
The XXXX would obviously be replaced by each of the item. You can spawn one of each for you to have an idea of how it looks like.
You can also add certain effects, like health/energy regeneration or elemental resistances. Or even glow, like you can see in my character on the previous image.
You can try out the glow by adding «glow» in between the effects paramters, just like so:
Simple for some effects, harder for others. In case of regenerations you need to use «healthRegen» or «energyRegen» respectively, and use them just like «maxHealth». Example:
I am not sure if the regenerations work properly anymore, but they might. Just remember that you can’t regen energy due the ingame mechanic of preventing energy regeneration while spending it.
And no, the Energy Regeneration field doesn’t regen your energy, instead simple cancels out the delay of the energy regeneration.
Okay, now having our stats and effects set, lets get to name and add a small description. Do you guys still know how to do that? I hope so.
This is perhaps the last thing I’ll be adding as tutorial for the parameters. Melee weapons have their slight own way of working, and staffs are diferent too, but all in all, everything comes down to know which parameters to use and what are the possibilities. You guys will have to experiment too.
As for colouring armors, things couldn’t be easier. You don’t have to go through all the trouble to use the path to reach for the file, and instead apply the directive at the end:
So, instead of brown and blue, we go for black and green. The Grey blues are used for the head components, which we can turn black too, and just switch the cyan into the same green of the weapon.
The pallet should help you see what colours are turning into what.
And there we go. That’s pretty much all of it, at least until I get to understand more and add more information here. The lists I’ll add at a later date, as I’ll need to make them still, and there are a lot of assets locations I am yet unaware, so that will take time.
I spent some of my time during the self-apointed days to figure some of the assets paths and how certain parameters works with other types of weapons.
Turns out things are simpler after knowing what to look for and what to use.
With this in mind, I’ll add my personal experience to each parameter, and a bit of insight on how to use them in other weapons.
For those who don’t know, the assets is where all the information of the game can be found. Or, well, at least most of it.
The location of your game assets are in the following path:
. \Steam\steamapps\common\Starbound\assets
Note: the path before the Steam folder differs if you haven’t installed it on the default definitions, but once you are inside, it should be easy to get at it.
Once you are inside, you’ll see a folder called «user», and a file called «packed.pak», and no assets to be found. That is because the Developers decided to compact everything in order to help load times and overall size of the game.
There is however a way to unpack them through a provided unpacker with the game, although those who are not confortable using good old CMD, I’ll propose something else:
Notes:
Inside this folder are all armors and vanity armors. This includes clothes.
They are mostly divided through races and/or their source ingame.
Notes:
You can find all types of projectiles here.
You can use any projectile in any weapon, though each projectile has it’s own data.
Notes:
Here you can find all sound effects that you can use on weapons.
That also means you can make a weapon fire with the sound of a creaking door.
The «projectile», «gun» and «melee» folders inside it have the sounds you’ll probably want otherwise.
That’s probably it for the purpouse of this guide.
I will still list the abilities for all weapons, both for convinience and quick reference.