Docker под Windows для разработки, разбор подводных камней
 Данная публикация является разбором особенностей контейнерной виртуализации Docker под системой Windows.
Она не претендует на роль исчерпывающей и по мере необходимости будет обновляться и дополняться.
За практическим руководством с нуля советую обратиться к этой публикации.
Содержание
Предварительные настройки
Контейнерная виртуализация или виртуализация на уровне операционной системы Docker нативно работает только на дистрибутивах Linux и FreeBSD (экспериментально).
На Windows вам понадобится гостевая Linux система либо специальная минималистичная виртуальная машина с ядром Linux от разработчиков Docker, которая и ставится из коробки.
Само собой разумеется, что вы включили виртуализацию у себя в BIOS/UEFI
Пункт настройки может называться по-разному: VT-x, VT-d, Intel VT, AMD-V, Virtualization Technology.
Еще одним минимальным системным требованием будет разрядность системы x64 и версия не ниже Windows 7 Pro.
Выбор между Docker Toolbox on Windows или Docker for Windows
Сборка включается в себя сам docker, утилиту docker-compose, утилиту для работы с виртуальной машиной docker-machine и клиент Kitematic.
Используется виртуальная машина (по умолчанию на VirtualBox) с минималистичным Linux окружением.
Позже для новых операционных систем выпустили Docker for Windows и Docker for Mac, которая на текущий момент является актуальной версией и продолжает развиваться.
Выбор между версиями не сложный:
— Если у вас Windows 10 x64 Pro, Enterprise или Education то включаем службу Hyper-V и ставим Docker for Windows.
Заметьте, что после включения службы Hyper-V пропадет возможность запускать и создавать x64 виртуальные машины на VirtualBox.
— Если же у вас другая версия Windows(7 Pro, 8, 8.1, 10 Home) то ставим VirtualBox и Docker Toolbox on Windows.
Несмотря на то, что Docker Toolbox разработчиками признан устаревшим работа с ним слабо отличается от Docker for Windows.
Вместе с установкой Docker Toolbox будет создана виртуальная машина.
В самом VirtualBox можно будет добавить оперативной памяти и ядер процессора на ваше усмотрение.
Windows контейнеры и Linux контейнеры
Docker for Windows предоставляет возможность переключать контейнеризацию между Linux и Windows версией.
В режиме Windows контейнеризации вы можете запускать только Windows приложения.
Замечу, что на май 2018 года в официальном Docker Hub существует всего 13 образов для Windows.
После включения Windows контейнеризации не забудьте добавить внешнюю сеть.
В конфигурационном файле docker-compose.yml это выглядит так:
Особенности монтирования папок
На примонтированных volume-ах не кидаются события файловой системы, поэтому inotify-tools не работает.
Спасибо пользователю eee
Если вы разрабатываете свой проект и пользуетесь docker-compose вне домашней папки то вам нужно будет проделать некоторые манипуляции.
Используя Docker for Windows для монтирования нового диска у вашего локального пользователя обязательно должен стоять пароль, который будет использоваться для доступа к shared папки.
Особенность заключается в том, что монтируемые внутрь контейнера диск будет монтироваться как от удаленной машины //10.0.75.1/DISK_DRIVE по протоколу SMB.
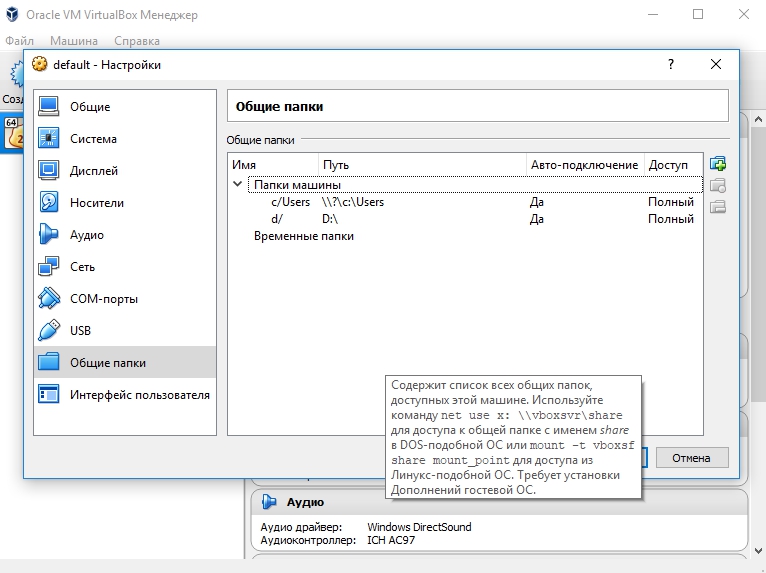
Для Docker Toolbox диски монтируются в самом VirtualBox на вкладке «Общие папки»
Пример для диска «D»:
Права доступа к монтируемым файлам и папкам
Как бы вам не хотелось, но для всех примонтированных из хост-машины файлов и папок будут стоять права 755 (rwx r-x r-x) и поменять их вы не сможете.
Остро встает вопрос при монтировании внутрь файла закрытого SSH ключа, права на который должны быть только у владельца(например 600).
В данном случае либо генерируют ключ при создании образа, либо прокидывают сокет ssh-agent с хост-машины.
Монтирование с хост-машины или volume
Монтирование внутрь контейнера происходит с использованием сети и протокола SMB, следовательно, внутри контейнера диск «D:\» будет примонтирован из источника //10.0.75.1/D
Использование volume внутри контейнера отображается как монтирование локального диска /dev/sda1, что влияет на скорость работы.
Простым тестом копирование файла на обычном HDD скорость работы получилась следующая:
Такая разница в скорости скорее всего связана с тем, что в volume данные сбрасываются на диск постепенно, задействуя кеш в ОЗУ.
Особенности разметки диска GPT и MBR
Данный пункт не является истинной так как опровергающей или подтверждающей информации в интернете найти не смог.
Если на хост-машине таблица разделов MBR, то контейнер с MySQL/MariaDB может упасть с ошибкой:
По умолчанию в базе данных включеён параметр innodb_use_native_aio, отвечающий за асинхронный ввод/вывод и его надо будет выключить.
Данная проблема также встречается на некоторых версиях MacOS.
Docker Toobox to Windows
Главное правило: начинать работу с запуска ярлыка на рабочем столе «Docker Quickstart Terminal», это решает 80% проблем.
— Бывает возникают проблемы с отсутствия переменных окружения, решается командой:
— Если все же возникают проблемы из разряда «docker: error during connect», необходимо выполнить:
Название Docker Machine по умолчанию default.
Docker Swarm
Ни в Docker for Mac, ни в Docker for Windows — нет возможности использовать запущенные демоны в качестве клиентов кластера (swarm members).
Спасибо пользователю stychos
Проблемы с кодировкой
Используя Docker Toolbox(на Docker for Windows не удалось воспроизвести) нашлась проблема с тем, что русские комментарии в docker-compose.yml файле приводили к ошибке:
Полезные ссылки
Заключение
Особенности работы с Docker контейнеризацией на системе Windows не отличается от работы на Linux за исключение разобранных выше.
В статье я умышленно не упомянул заметно низкую скорость работы контейнеров и overhead используя систему Windows как само собой разумеющееся.
Буду рад услышать ваши отзывы. Не стесняйтесь предлагать улучшения или указывать на мои ошибки.
Эта статья даст вам полное представление о Docker Desktop для пользователей Windows и MAC. Мы изучим установку Docker Desktop на компьютерах с Windows и Mac. После установки мы также попытаемся выполнить некоторые операции Docker.
Что такое Docker Desktop?
Docker Desktop предлагает важные и наиболее полезные функции, такие как быстрые циклы редактирования, уведомления об изменениях файлов, встроенная поддержка корпоративной сети и гибкость для работы с собственным выбором прокси и VPN.
Docker Desktop состоит из инструментов для разработчика, приложения Docker, Kubernetes и синхронизации версий. Он позволяет вам создавать сертифицированные образы и шаблоны языков и инструментов.
Прежде чем перейти к процессу установки, давайте разберемся с его версиями.
Версии Docker
Docker в основном поставляется в двух версиях, в Community и ENterprise.
Community версия поставляется с бесплатным набором продуктов Docker. ENterprise корпоративная версия представляет собой сертифицированную контейнерную платформу, которая предоставляет коммерческим пользователям дополнительные функции, такие как безопасность образов, управление образами, оркестровка и управление средой выполнения контейнеров, но по разумной цене.
Мы начнем наше обучение с Community Edition. Контейнеры Docker, работающие в конкретной операционной системе, совместно используют ядро ОС. Это означает, что мы не можем использовать ядро Windows (хост) для запуска контейнеров Linux или наоборот. Чтобы проделать это, у нас есть Docker Desktop для Windows и MAC.
Выпуски Docker Desktop
Docker Desktop выпускается в двух вариантах.
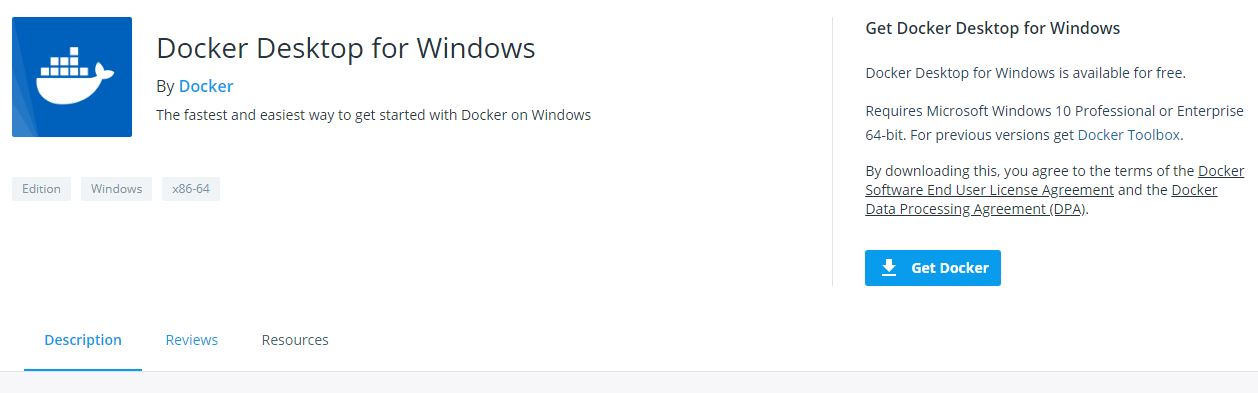
Docker на Windows
Есть два варианта Docker на Windows.
1. Использование Docker Toolbox
Docker Toolbox предоставляет набор легких инструментов.
Вышеуказанные инструменты устраняют необходимость развертывания отдельной виртуальной машины для запуска Docker. Просто установите исполняемый файл панели инструментов Docker непосредственно в Windows и начните разработку приложений. Требуется 64-битная ОС и Windows 7 или выше с включенным режимом виртуализации.
2. Использование Docker Desktop
Он по-прежнему будет запускать Docker на Linux-машине, созданной под ним. Но на этот раз вместо виртуальной машины Oracle мы использовали нативный Microsoft Hyper-V.
Установка Docker на Windows
Чтобы запустить Hyper-V, оборудование должно соответствовать следующим требованиям:
Следовательно, программная и аппаратная зависимость заключается в запуске Docker Desktop на Windows.
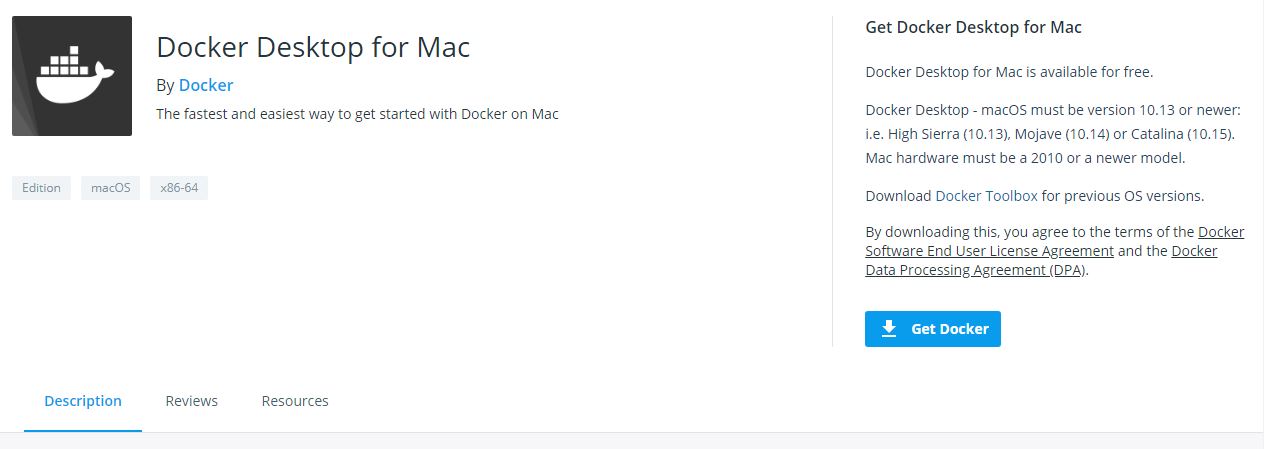
Установка Docker на macOS
Работа с образами
После установки проверьте версию установленного Docker Engine.
Здесь мы будем тянуть образ Redis.
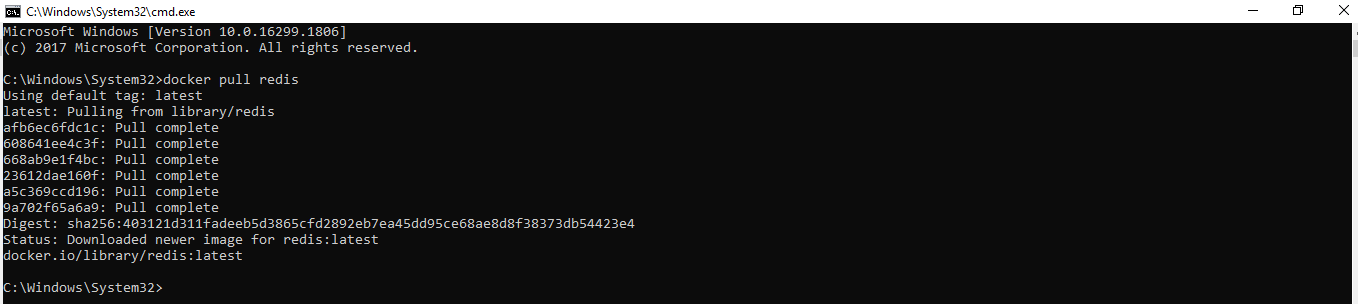
С помощью простой команды run образы можно скачивать и загружать на GitHub или Docker Hub, и любой пользователь во всем мире может получить к нему доступ и начать работать с ним.
Docker Container запускает образ Docker. Следующим шагом является запуск контейнера.

Будет создан зашифрованный идентификатор контейнера. Вы можете быстро проверить состояние работающего экземпляра в Docker, нажав на Dashboard option.

Обязательно остановите контейнер, прежде чем удалять его из Docker Engine.

Возможности Docker Desktop
Существует множество преимуществ:
Docker Desktop for Windows user manual
Estimated reading time: 18 minutes
Welcome to Docker Desktop! The Docker Desktop for Windows user manual provides information on how to configure and manage your Docker Desktop settings.
For information about Docker Desktop download, system requirements, and installation instructions, see Install Docker Desktop.
Settings
The Docker Desktop menu allows you to open the Docker Dashboard, run the Quick Start Guide, configure your Docker settings such as installation, updates, version channels, Docker Hub login, and more.
This section explains the configuration options accessible from the Settings dialog.
To open the Docker Desktop menu, right-click the Docker icon in the Notifications area (or System tray):
Select Settings to open the Settings dialog:

General
On the General tab, you can configure when to start Docker and specify other settings.
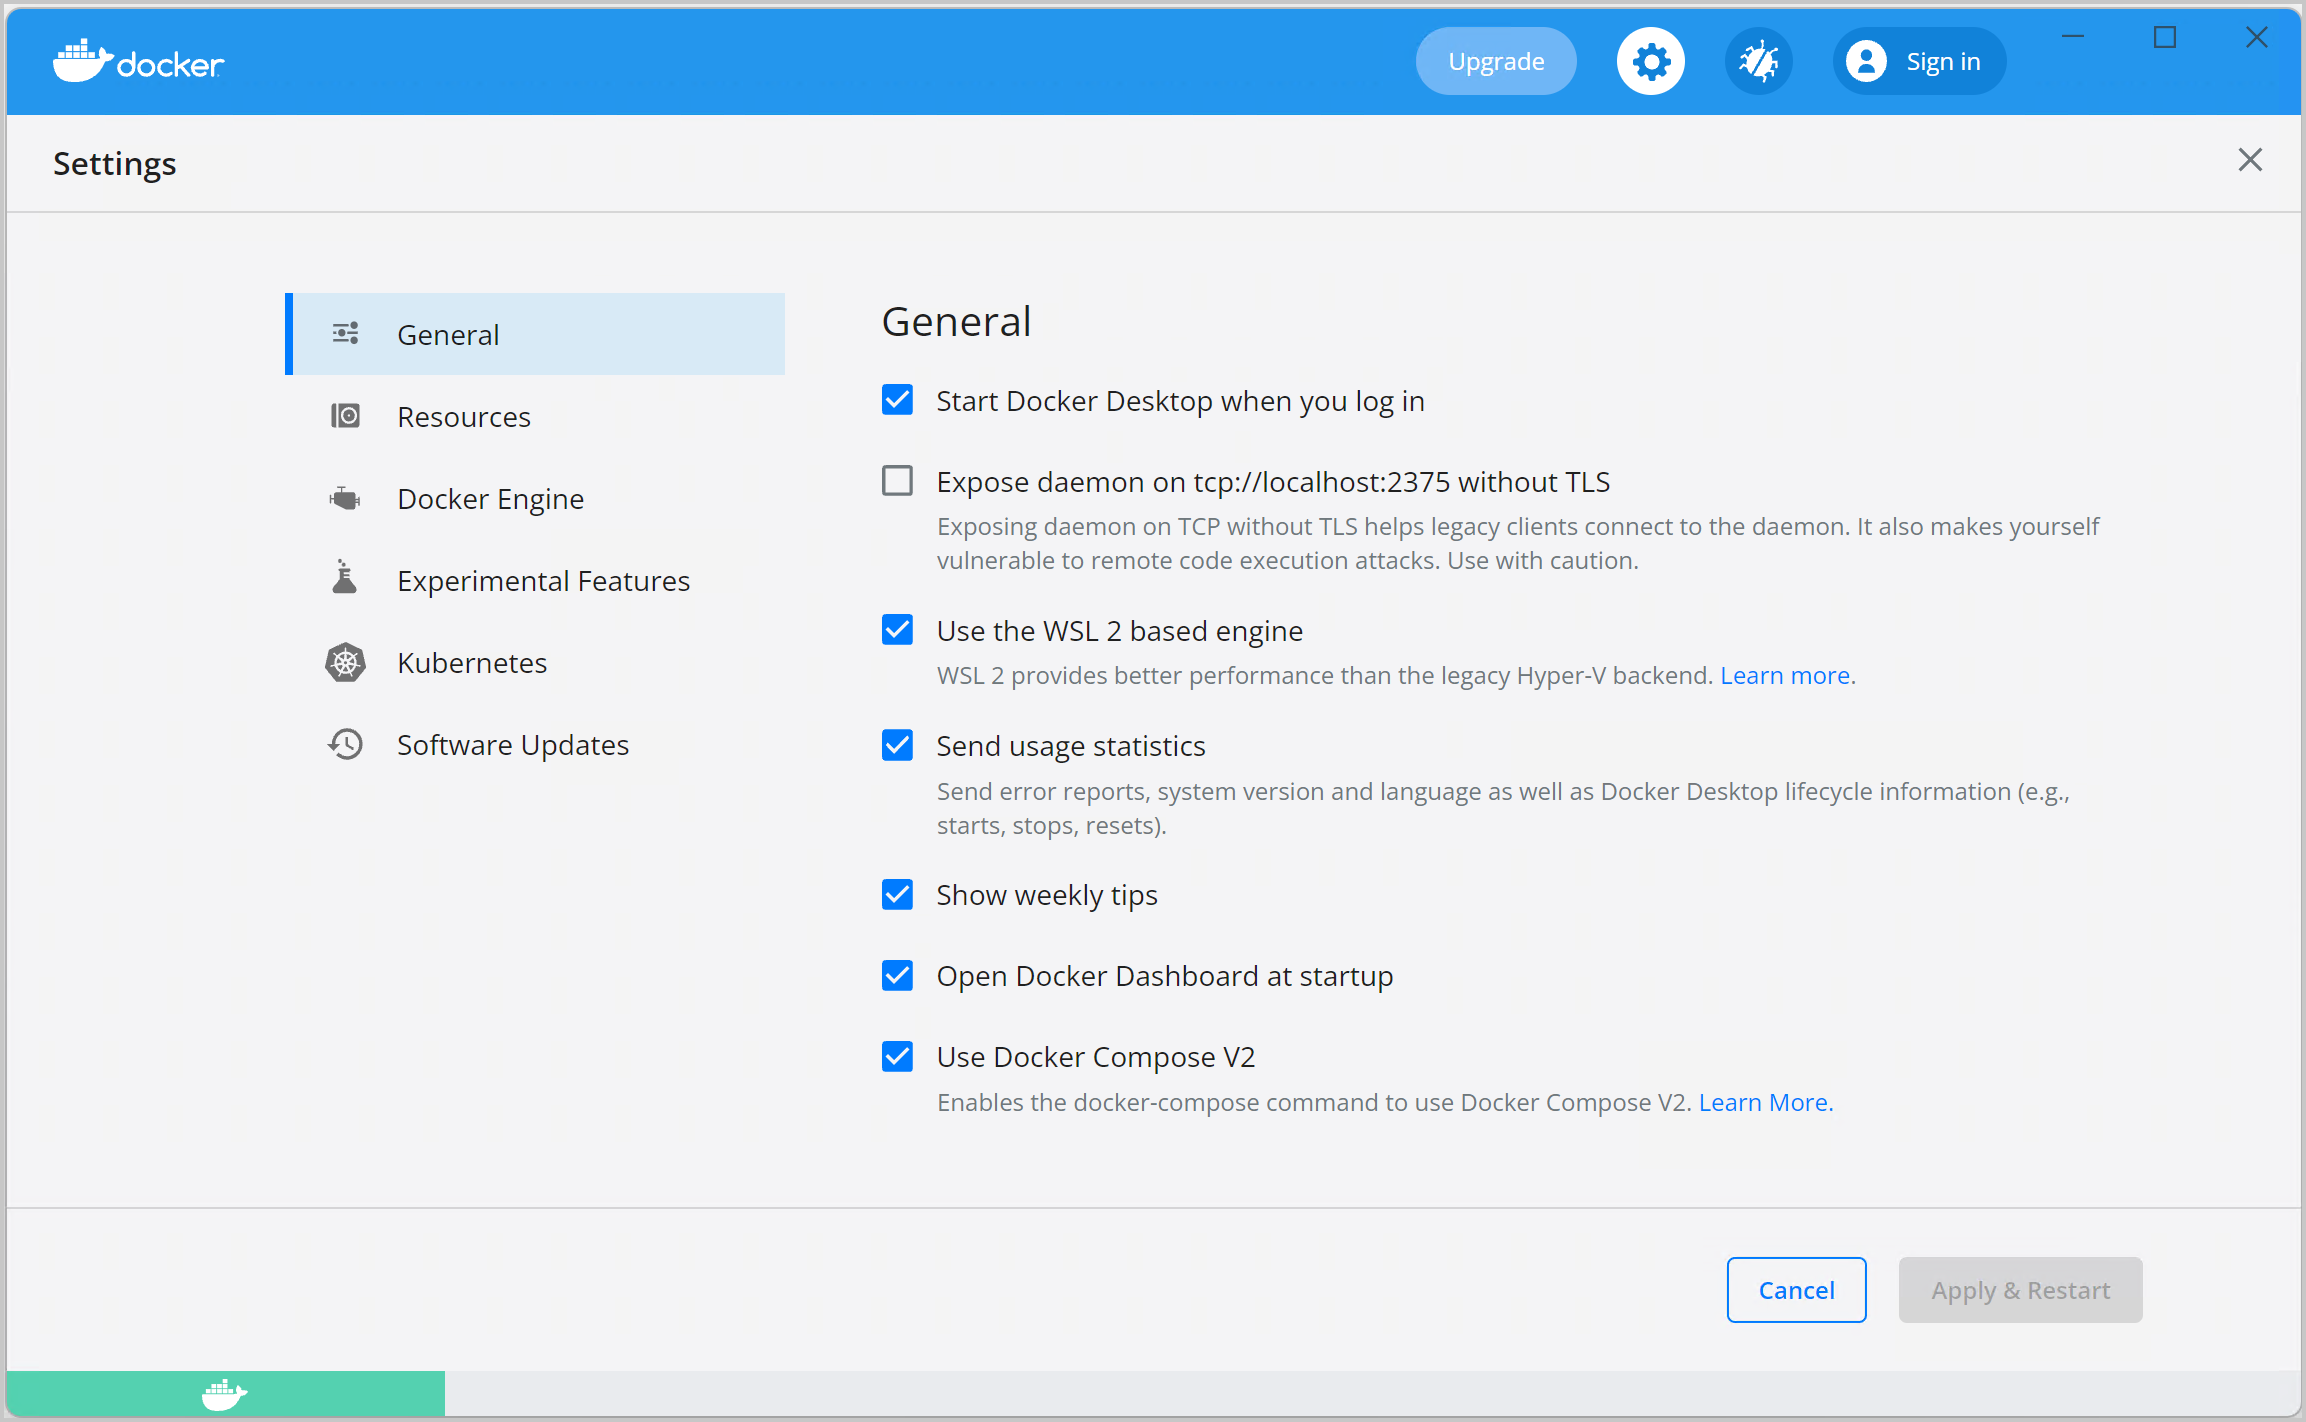
Start Docker when you log in: Select this option to automatically start Docker Desktop when you log into your Windows machine.
Expose daemon on tcp://localhost:2375 without TLS: Click this option to enable legacy clients to connect to the Docker daemon. You must use this option with caution as exposing the daemon without TLS can result in remote code execution attacks.
Use the WSL 2 based engine: WSL 2 provides better performance than the legacy Hyper-V backend. For more information, see Docker Desktop WSL 2 backend.
Send usage statistics: By default, Docker Desktop sends diagnostics, crash reports, and usage data. This information helps Docker improve and troubleshoot the application. Clear the check box to opt out. Docker may periodically prompt you for more information.
Show weekly tips: Displays useful advice and suggestions about using Docker.
Open Docker Desktop dashboard at startup: Automatically opens the dashboard when starting Docker Desktop.
Use Docker Compose V2: Select this option to enable the docker-compose command to use Docker Compose V2. For more information, see Docker Compose V2.
Resources
The Resources tab allows you to configure CPU, memory, disk, proxies, network, and other resources. Different settings are available for configuration depending on whether you are using Linux containers in WSL 2 mode, Linux containers in Hyper-V mode, or Windows containers.
Advanced
The Advanced tab is only available in Hyper-V mode, because Windows manages the resources in WSL 2 mode and Windows container mode. In WSL 2 mode, you can configure limits on the memory, CPU, and swap size allocated to the WSL 2 utility VM.
Use the Advanced tab to limit resources available to Docker.
CPUs: By default, Docker Desktop is set to use half the number of processors available on the host machine. To increase the processing power, set this to a higher number. To decrease the processing power, set this to a lower number.
Memory: By default, Docker Desktop is set to use 2 GB runtime memory, allocated from the total available memory on your machine. To increase the RAM, set this to a higher number. To decrease the RAM, lower the number.
Swap: Configure swap file size as needed. The default is 1 GB.
Disk image size: Specify the size of the disk image.
Disk image location: Specify the location of the Linux volume where containers and images are stored.
You can also move the disk image to a different location. If you attempt to move a disk image to a location that already has one, you get a prompt asking if you want to use the existing image or replace it.
File sharing
The File sharing tab is only available in Hyper-V mode because the files are automatically shared in WSL 2 mode and Windows container mode.
Use File sharing to allow local directories on Windows to be shared with Linux containers. This is especially useful for editing source code in an IDE on the host while running and testing the code in a container. Note that configuring file sharing is not necessary for Windows containers, only Linux containers. If a directory is not shared with a Linux container you may get file not found or cannot start service errors at runtime. See Volume mounting requires shared folders for Linux containers.
File share settings are:
Add a Directory: Click + and navigate to the directory you want to add.
Tips on shared folders, permissions, and volume mounts
Share only the directories that you need with the container. File sharing introduces overhead as any changes to the files on the host need to be notified to the Linux VM. Sharing too many files can lead to high CPU load and slow filesystem performance.
Shared folders are designed to allow application code to be edited on the host while being executed in containers. For non-code items such as cache directories or databases, the performance will be much better if they are stored in the Linux VM, using a data volume (named volume) or data container.
Docker Desktop sets permissions to read/write/execute for users, groups and others 0777 or a+rwx. This is not configurable. See Permissions errors on data directories for shared volumes.
Shared folders on demand
You can share a folder “on demand” the first time a particular folder is used by a container.
If you run a Docker command from a shell with a volume mount (as shown in the example below) or kick off a Compose file that includes volume mounts, you get a popup asking if you want to share the specified folder.
You can select to Share it, in which case it is added to your Docker Desktop Shared Folders list and available to containers. Alternatively, you can opt not to share it by selecting Cancel.

Proxies
Your proxy settings, however, will not be propagated into the containers you start. If you wish to set the proxy settings for your containers, you need to define environment variables for them, just like you would do on Linux, for example:
For more information on setting environment variables for running containers, see Set environment variables.
Network
The Network tab is not available in the Windows container mode because Windows manages networking.
You can configure Docker Desktop networking to work on a virtual private network (VPN). Specify a network address translation (NAT) prefix and subnet mask to enable Internet connectivity.
DNS Server: You can configure the DNS server to use dynamic or static IP addressing.
Updating these settings requires a reconfiguration and reboot of the Linux VM.
WSL Integration
In WSL 2 mode, you can configure which WSL 2 distributions will have the Docker WSL integration.
You can also select any additional distributions you would like to enable the WSL 2 integration on.
For more details on configuring Docker Desktop to use WSL 2, see Docker Desktop WSL 2 backend.
Docker Engine
The Docker Engine page allows you to configure the Docker daemon to determine how your containers run.
Type a JSON configuration file in the box to configure the daemon settings. For a full list of options, see the Docker Engine dockerd commandline reference.
Click Apply & Restart to save your settings and restart Docker Desktop.
Command Line
On the Command Line page, you can specify whether or not to enable experimental features.
You can toggle the experimental features on and off in Docker Desktop. If you toggle the experimental features off, Docker Desktop uses the current generally available release of Docker Engine.
Experimental features
Experimental features provide early access to future product functionality. These features are intended for testing and feedback only as they may change between releases without warning or can be removed entirely from a future release. Experimental features must not be used in production environments. Docker does not offer support for experimental features.
For a list of current experimental features in the Docker CLI, see Docker CLI Experimental features.
Kubernetes
The Kubernetes tab is not available in Windows container mode.
Docker Desktop includes a standalone Kubernetes server that runs on your Windows machine, so that you can test deploying your Docker workloads on Kubernetes. To enable Kubernetes support and install a standalone instance of Kubernetes running as a Docker container, select Enable Kubernetes.
For more information about using the Kubernetes integration with Docker Desktop, see Deploy on Kubernetes.
Software Updates
The Software Updates section notifies you of any updates available to Docker Desktop. When there’s a new update, you can choose to download the update right away, or click the Release Notes option to learn what’s included in the updated version.
Disable automatic check for updates
Starting with Docker Desktop 4.2.0, the option to turn off the automatic check for updates is available for users on all Docker subscriptions, including Docker Personal and Docker Pro. Update to Docker Desktop 4.2.0 to start using this feature.
Turn off the check for updates by clearing the Automatically Check for Updates check box. This disables notifications in the Docker menu and also the notification badge that appears on the Docker Dashboard. To check for updates manually, select the Check for updates option in the Docker menu.
To allow Docker Desktop to automatically download new updates in the background, select Always download updates. This downloads newer versions of Docker Desktop when an update becomes available. After downloading the update, click Apply and Restart to install the update. You can do this either through the Docker menu or in the Updates section in the Docker Dashboard.
Dashboard
The Docker Dashboard enables you to interact with containers and applications and manage the lifecycle of your applications directly from your machine. The Dashboard UI shows all running, stopped, and started containers with their state. It provides an intuitive interface to perform common actions to inspect and manage containers and existing Docker Compose applications. For more information, see Docker Dashboard.
Add TLS certificates
You can add trusted Certificate Authorities (CAs) (used to verify registry server certificates) and client certificates (used to authenticate to registries) to your Docker daemon.
Reset
The Restart Docker Desktop and Reset to factory defaults options are now available on the Troubleshoot menu. For information, see Logs and Troubleshooting.
Troubleshoot
Visit our Logs and Troubleshooting guide for more details.
Log on to our Docker Desktop for Windows forum to get help from the community, review current user topics, or join a discussion.
Log on to Docker Desktop for Windows issues on GitHub to report bugs or problems and review community reported issues.
For information about providing feedback on the documentation or update it yourself, see Contribute to documentation.
Switch between Windows and Linux containers
From the Docker Desktop menu, you can toggle which daemon (Linux or Windows) the Docker CLI talks to. Select Switch to Windows containers to use Windows containers, or select Switch to Linux containers to use Linux containers (the default).
For more information on Windows containers, refer to the following documentation:
Microsoft documentation on Windows containers.
Build and Run Your First Windows Server Container (Blog Post) gives a quick tour of how to build and run native Docker Windows containers on Windows 10 and Windows Server 2016 evaluation releases.
To understand how to connect to Windows containers from the local host, see I want to connect to a container from Windows
Settings dialog changes with Windows containers
When you switch to Windows containers, the Settings dialog only shows those tabs that are active and apply to your Windows containers:
If you set proxies or daemon configuration in Windows containers mode, these apply only on Windows containers. If you switch back to Linux containers, proxies and daemon configurations return to what you had set for Linux containers. Your Windows container settings are retained and become available again when you switch back.
Dashboard
The Docker Dashboard enables you to interact with containers and applications and manage the lifecycle of your applications directly from your machine. The Dashboard UI shows all running, stopped, and started containers with their state. It provides an intuitive interface to perform common actions to inspect and manage containers and Docker Compose applications. For more information, see Docker Desktop Dashboard.
Docker Hub
Select Sign in /Create Docker ID from the Docker Desktop menu to access your Docker Hub account. Once logged in, you can access your Docker Hub repositories directly from the Docker Desktop menu.
For more information, refer to the following Docker Hub topics:
Two-factor authentication
Docker Desktop enables you to sign into Docker Hub using two-factor authentication. Two-factor authentication provides an extra layer of security when accessing your Docker Hub account.
You must enable two-factor authentication in Docker Hub before signing into your Docker Hub account through Docker Desktop. For instructions, see Enable two-factor authentication for Docker Hub.
After you have enabled two-factor authentication:
Go to the Docker Desktop menu and then select Sign in / Create Docker ID.
Enter your Docker ID and password and click Sign in.
After you have successfully signed in, Docker Desktop prompts you to enter the authentication code. Enter the six-digit code from your phone and then click Verify.

After you have successfully authenticated, you can access your organizations and repositories directly from the Docker Desktop menu.
Pause/Resume
Starting with the Docker Desktop 4.2 release, you can pause your Docker Desktop session when you are not actively using it and save CPU resources on your machine. When you pause Docker Desktop, the Linux VM running Docker Engine will be paused, the current state of all your containers are saved in memory, and all processes are frozen. This reduces the CPU usage and helps you retain a longer battery life on your laptop. You can resume Docker Desktop when you want by clicking the Resume option.
The Pause/Resume feature is currently not available in the Windows containers mode.
To pause Docker Desktop, right-click the Docker icon in the notifications area (or System tray) and then click Pause.
Docker Desktop now displays the paused status on the Docker menu and on all screens on the Docker Dashboard. You can still access the Preferences and the Troubleshoot menu from the Dashboard when you’ve paused Docker Desktop.
Select  > Resume to resume Docker Desktop.
When Docker Desktop is paused, running any commands in the Docker CLI will automatically resume Docker Desktop.
Adding TLS certificates
You can add trusted Certificate Authorities (CAs) to your Docker daemon to verify registry server certificates, and client certificates, to authenticate to registries.
How do I add custom CA certificates?
Docker Desktop supports all trusted Certificate Authorities (CAs) (root or intermediate). Docker recognizes certs stored under Trust Root Certification Authorities or Intermediate Certification Authorities.
Docker Desktop creates a certificate bundle of all user-trusted CAs based on the Windows certificate store, and appends it to Moby trusted certificates. Therefore, if an enterprise SSL certificate is trusted by the user on the host, it is trusted by Docker Desktop.
To learn more about how to install a CA root certificate for the registry, see Verify repository client with certificates in the Docker Engine topics.
How do I add client certificates?
You can add your client certificates in
When the Docker Desktop application starts, it copies the
/.docker/certs.d folder on your Windows system to the /etc/docker/certs.d directory on Moby (the Docker Desktop virtual machine running on Hyper-V).
You need to restart Docker Desktop after making any changes to the keychain or to the
/.docker/certs.d directory in order for the changes to take effect.
The registry cannot be listed as an insecure registry (see Docker Daemon). Docker Desktop ignores certificates listed under insecure registries, and does not send client certificates. Commands like docker run that attempt to pull from the registry produce error messages on the command line, as well as on the registry.
To learn more about how to set the client TLS certificate for verification, see Verify repository client with certificates in the Docker Engine topics.
Where to go next
Try out the walkthrough at Get Started.
Dig in deeper with Docker Labs example walkthroughs and source code.