Ториум мод вики бард
The Bard is a class added by the Thorium Mod as of version 1.4.0.0. The Bard class’ weapons, armor, and accessories focus on providing short, stat-improving empowerments while still dealing symphonic damage.
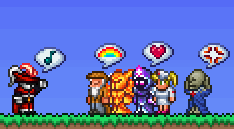
Although the Bard buffs themselves when fighting, a larger benefit can be found through teamwork; empowerments are also given to friendly players standing near the Bard, so they are a great addition to a multiplayer scenario.
The Bard class is largely developed, with content spread throughout the game. This includes 9 armor sets, 56 accessories, 30 buffs and 110 items.
Contents
Mechanics [ ]
Inspiration [ ]
Instead of using Mana, the Bard weapons draw from a unique resource called inspiration, which is increased using Inspiration Fragments, Inspiration Shards, and Inspiration Crystals. Inspiration regenerates automatically. Although many of the Bard items are specific to inspiration, the fact that it’s separate from Mana makes it a tempting choice for another class’ backup.
Symphonic Damage [ ]
The Bard’s musical weapons hit with a specific damage type called symphonic damage. Accessories and armor can be used to augment symphonic damage output, and generic ‘damage’ buffs, such as the one from the Scuba Curva, still increase Bard’s damage.
Big Instruments [ ]
Big instruments are a subset of Bard weapons that utilize a timing mechanic. When held out, a timer will appear underneath the player (or underneath the cursor if the Move Instrument Timer to Mouse configuration setting is set to true); the instruments’ effects vary depending on whether their attacks are used within a specific window of time or not. As the player successfully times their attacks, the big instrument will gain power, provided empowerment level, along with other effects, whereas missing the timing will greatly decrease these bonuses.
Each instrument category, except for Electronic, has its own unique timer, with differing patterns:
| Instrument Category | Timer | Instruction | Instruments | |
|---|---|---|---|---|
| Brass |  | Hold the attack button while the marker is over the highlighted area. |  | Alphorn |
 | Organ | |||
| Percussion |  | Attack while the marker is over the highlighted area. |  | Steel Drum |
 | Xylophone | |||
 | The Set | |||
| String |  | Attack in three-round bursts as the marker passes over each of the highlighted area. |  | Grand Piano |
 | Scholar’s Harp | |||
| Wind |  | Alternate between the left- and right-click buttons while the marker is over the left and right sides respectively. |  | Song of Ice & Fire |
 | Bagpipe | |||
While a big instrument is held out for the first time, a mouse icon will appear in order to provide a guide on each timer’s function.
Guide:Bard

This means the page will walk you through a specific task, strategy, or enemy/boss fight.
This is a general progression and mechanic guide on the Bard Class introduced in the Thorium Mod. This guide will go in depth into the inner workings of the class, how to be an effective bard, and when it is best to play as one.
A bard (left) performs for his audience.
Contents
Class Background [ ]
Knowing Your Role [ ]
As a bard, your gameplay isn’t remarkably different from classes like the ranger or mage. The primary mechanic that draws attention away from damaging enemies and bosses are the bards Empowerments. Empowerments are powerful buffs that get applied to the bard and his nearby allies when an instrument is used. Much of the power behind a bard comes from these boosts, allowing for better damage, defense, movement, and resource spending. As a bard you’ll want to carry multiple instruments at once to allow a broader array of empowerment options. If you or your team is on the move, player percussion instruments to improve your mobility. If you’re safely damaging enemies, use a brass instrument to increase you or your teams damage potential. If you or your team is stuck in long winded battles and boss fights, use string and wind instruments to improve your survivability and resource management.
Good job you little musician!
Progression [ ]
Early Game [ ]
At the start of the game, you have access to a variety of items from safer biomes like the Surface and Cavern. This guide assumes you haven’t defeated a single boss or invasion yet.
| Wind | String | Brass | Percussion | Electronic | Armor | Accessories | Buffs/Potions |
|---|---|---|---|---|---|---|---|
| Wooden Whistle Icy Piccolo Harmonica Flute Magma Rackett | Ukulele Grand Piano Dynasty Guzheng Skyware Lute | Gold Bugle Horn Platinum Bugle Horn Alphorn | Drum Mallet Tambourine Antlion Maraca Seashell Castanets | n/a | Crier armor | Music Notes Mix Tape High Quality Reed Marching Boots Faberge Egg Opal Ring | Earworm Potion Creativity Potion |
Eye of Cthulhu [ ]
After defeating the Eye of Cthulhu, you have access to a few items. This guide assumes you have defeated every previous boss and completed a Blood Moon.
| Wind | String | Brass | Percussion | Electronic | Armor | Accessories | Buffs/Potions |
|---|---|---|---|---|---|---|---|
| n/a | Ukulele Grand Piano Dynasty Guzheng Skyware Lute | Didgeridoo Vicious Mockery | Sinister Honk | n/a | n/a | Guitar Pick Mouthpiece Plunger Mute Vibration Tuner Concert Tickets | n/a |
Eater of Worlds / Brain of Cthulhu [ ]
After defeating the boss of the world’s evil, you have access to a few items. This guide assumes you have defeated every previous boss and have not encountered the Goblin Army yet.
| Wind | String | Brass | Percussion | Electronic | Armor | Accessories | Buffs/Potions |
|---|---|---|---|---|---|---|---|
| Meteorite Oboe | Sitar | n/a | Ebonwood Tambourine Shadewood Tambourine Jar O’ Mayo | n/a | Jester armor | Pad o’ Paper Fan Letter | n/a |
Pre-Skeletron [ ]
Before fighting Skeletron, a number of items are available to the player. This guide assumes you have defeated every previous boss, the Goblin Army, the first tier of Old One’s Army and have entered the Jungle or the Aquatic Depths.
| Wind | String | Brass | Percussion | Electronic | Armor | Accessories | Buffs/Potions |
|---|---|---|---|---|---|---|---|
| Riveting Tadpole Forest Ocarina Panflute Honey Recorder | Yew Wood Lute | Scuba Curva Conch Shell | Steel Drum Aquamarine Wineglass Blooming Bell | Sonar Cannon | n/a | Cork Grease Kick Petal Waxy Rosin Band Kit | n/a |
Post-Skeletron [ ]
After defeating Skeletron, a sizable amount of new bard items will be made available to the player. This guide assumes you have defeated every previous boss, event, and have explored the world thoroughly.
| Wind | String | Brass | Percussion | Electronic | Armor | Accessories | Buffs/Potions |
|---|---|---|---|---|---|---|---|
| Song of Ice & Fire | Calaveras Nocturne | Bone Trumpet Hot Horn | Bongos Bronze Tuning Fork | Microphone Granite Boom Box Roboboe | Noble armor | Subwoofer Track Player Metronome Devil’s Subwoofer Brass Cap Shock Absorber | n/a |
Post-Wall of Flesh [ ]
After defeating the Wall of Flesh, Hardmode begins and bards gain access to many new weapons and items. This guide assumes you have defeated every boss up until the mechanical bosses.
| Wind | String | Brass | Percussion | Electronic | Armor | Accessories | Buffs/Potions |
|---|---|---|---|---|---|---|---|
| Mythril Melodica Orichalcum Slide Whistle Bagpipe Geode Saxophone Chrono Ocarina Concertina Kazoo | Acoustic Guitar Scholar’s Harp Lullaby Riff Weaver Violin Eskimo Banjo Sunflare Guitar | Dragon’s Wail Trombone Serpent’s Cry 24-Carat Tuba Shadowflame Warhorn | Vinyl Record Frostwind Cymbals Hell’s Bell Wind Chimes Xylophone | n/a | Marching Band armor | Conductor’s Baton Bard Emblem Epic Mouthpiece Digital Tuner Straight Mute Guitar Pick Claw Headset Musician’s Handbook | Inspirational Reach Potion Conductor’s Stand |
Post-Mechanical Bosses [ ]
After defeating the three mechanical bosses, more items are made available through the Souls, Life-Powered Energy Cells, Hallowed Bars, Strange Plating and the Solar Eclipse.
| Wind | String | Brass | Percussion | Electronic | Armor | Accessories | Buffs/Potions |
|---|---|---|---|---|---|---|---|
| Steam Flute | n/a | Prime’s Roar Cadaver’s Cornet Zunpet | Portable Wintergatan The Green Tambourine Turtle Drums | Midnight Bass Booster Hallowed Megaphone | Cyber Punk armor | Auto Tuner Music Player Diss Track | n/a |
Post-Plantera [ ]
After defeating Plantera, the Jungle Temple, Frost Moon, Pumpkin Moon and their items become available.
| Wind | String | Brass | Percussion | Electronic | Armor | Accessories | Buffs/Potions |
|---|---|---|---|---|---|---|---|
| Pungi Bassoon Clarinet Vuvuzela | Fishbone The Maw Strawberry Heart Siren’s Lyre Call of Cthulhu | Buisine Ghastly French Horn Organ | Haunting Bass Drum Jingle Bells | The Black Otamatone The Bopper | Ornate armor Maestro armor | n/a | n/a |
Post-Golem [ ]
After defeating the Golem, the Martian Madness event, third tier of the Old One’s Army, Celestial Towers, and their items become available.
| Wind | String | Brass | Percussion | Electronic | Armor | Accessories | Buffs/Potions |
|---|---|---|---|---|---|---|---|
| n/a | Shooting Star Blast-Guitar | Betsy’s Bellow | The Triangle | Terrarium Autoharp Turntable Sound Sage’s Lament | n/a | Terrarium Surround Sound | n/a |
Post-Moon Lord [ ]
After defeating the Moon Lord, you will have access to The Primordials fight and its items. This guide assumes you have done everything else in vanilla and the mod.
| Wind | String | Brass | Percussion | Electronic | Armor | Accessories | Buffs/Potions |
|---|---|---|---|---|---|---|---|
| Holophonor | Edge of Imagination | Sousaphone | The Set | Sonic Amplifier Black MIDI | Shooting Star armor Rhapsodist armor | n/a | n/a |
Mechanics [ ]
The Bard class has various unique mechanics that are relevant to their success. A simplified version of this list can be found on the main Bard page, but this guide will go slightly more in-depth in this section.
Empowerments [ ]
Empowerments are temporary stat boosts that the bard constantly provides to himself and nearby allies when using their instrument weapons. As one of the defining features of the class, many bard items are associated with the application or power of empowerments. Empowerments are grouped into 5 categories and are given by specific instrument types with the general rule being:
Electronic is unique in that it provides no stat boosting empowerments themselves, but instead prolongs the active duration of any empowerments currently active on players.
A comprehensive list of each empowerment can be found on the Empowerments page.
Inspiration [ ]
Instead of using Mana, the Bard weapons draw from a unique resource called inspiration, which is increased using Inspiration Fragments, Inspiration Shards, and Inspiration Crystals. Inspiration regenerates automatically. Although many of the Bard items are specific to inspiration, the fact that it’s separate from Mana makes it a tempting choice for another class’ backup. Inspiration regenerates far more quickly when allowed to run its course, encouraging a sort of «reload» period for the resource.
Symphonic Damage [ ]
The Bard’s musical weapons hit with a specific damage type called symphonic damage. Accessories and armor can be used to augment symphonic damage output, and generic ‘damage’ buffs, such as the one from the Scuba Curva, still increase Bard’s damage.
Big Instruments [ ]
Big instruments are a subset of Bard weapons that utilize a timing mechanic. When held out, a timer will appear underneath the player (or underneath the cursor if the Move Instrument Timer to Mouse configuration setting is set to true); the instruments’ effects vary depending on whether their attacks are used within a specific window of time or not. As the player successfully times their attacks, the big instrument will gain power, provided empowerment level, along with other effects, whereas missing the timing will greatly decrease these bonuses.
Each instrument category, except for Electronic, has its own unique timer, with differing patterns:
| Instrument Category | Timer | Instruction | Instruments | |
|---|---|---|---|---|
| Brass | | Hold the attack button while the marker is over the highlighted area. | | Alphorn |
| | Organ | |||
| Percussion | | Attack while the marker is over the highlighted area. | | Steel Drum |
| | Xylophone | |||
| | The Set | |||
| String | | Attack in three-round bursts as the marker passes over each of the highlighted area. | | Grand Piano |
| | Scholar’s Harp | |||
| Wind | | Alternate between the left- and right-click buttons while the marker is over the left and right sides respectively. | | Song of Ice & Fire |
| | Bagpipe | |||
While a big instrument is held out for the first time, a mouse icon will appear in order to provide a guide on each timer’s function.
Tips, Tricks, and Strategies [ ]
Empowerment Focus [ ]
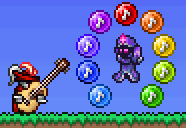
An example of class focused empowerments.
While most empowerment effects are helpful for all classes, some benefit from specific boosts more than others. When playing in multiplayer, be sure to check what classes your teammates are focusing. For instance, if you have a friend that’s predominately focusing tank or melee builds, keeping string instruments on you would help them greatly as the defensive empowerments they provide would be invaluable to them. Likewise, if you have a healer or mage in your group, they would benefit from wind instruments and their resource conserving boosts. It’s important to be mindful of your allies and the empowerments they might benefit the most from.
Item Specialties [ ]
A variety of items had a specialty purpose in mind when they were added to the game. On the off chance some are lost to players, this list aims to inform the player on why you may want to use a handful of items in particular, given some of their questionable attributes.
Drum Mallet: The Drum Mallet is an early game swung weapon that acts much like a melee sword. It’s speciality lies in its right click ability, which places a bouncy drum on the ground for players to use. Use it to reach higher areas while exploring around, without the need to place blocks or ropes. It can also be used to prevent fall damage.
Steam Flute: The Steam Flute is a post-Mech wind instrument with reasonable damage output and a special right click ability. When used, it generates a cloud of smoke that grants players that touch it reduced aggro range. Use it on allies with worse defensive stats to try and shake bosses and swarming enemies off of them.
Fishbone: The Fishbone is a post-Plantera string instrument that deals additional damage to enemies under the effect of Crowd Control effects. Use it with it’s right click ability to rapidly apply Oozed to enemies or with allies that also apply crowd control effects onto enemies for maximum potential.
Terrarium Autoharp: The Terrarium Autoharp is unique in it’s ability to apply empowerments from multiple different instrument types. It pairs nicely with the Ornate armor and Auto Tuner where despite only granting tier 1 of it’s empowerments, they may increase in level, granting a large boost in empowerment effectiveness.
Music Note Statue: The Music Note Statue functions similarly to the Heart Statue and Star Statue, offering a wired way to recover Inspiration. It should be noted that it spawns Inspiration Note (cyan) which doesn’t recover as much inspiration as the common dropped form.
Final Comments [ ]
All in all, the Bard is a lot closer to the feel of the original 4 classes, compared to the Healer. With the exception of the empowerment mechanic and inspiration, bards can comfortably focus on dealing damage to enemies without having to worry about anything out of the ordinary. It’s also important to remember that just because the bard provides bonuses to allies in a multiplayer setting, they function quite well when alone. So please feel encouraged to give the class a try even in single player! Good luck to all you bards out there, play a symphony and lead your team to victory!
Inspiration

Inspiration is a resource consumed by the player in order to use symphonic weapons. The player’s current and maximum inspiration is shown as a circular series of wedges above the player, while inspiration is being used. Inspiration regenerates automatically as long as the player isn’t firing a Bard weapon.
Each character starts with 10 maximum inspiration. Using Inspiration Fragments increases the player’s maximum inspiration by 1 permanently by adding another wedge to the meter, up to a maximum of 20. If the player’s inspiration is already 20 or more, using Inspiration Shards increases the player’s maximum inspiration by 1 permanently by adding a purple layer to already-existing wedges, up to a maximum of 30. If the player’s inspiration is 30 or more, using Inspiration Crystals further increases the player’s maximum inspiration by 1 permanently by adding an orange layer of the already-existing purple wedges, up to a maximum of 40.
Affecting Inspiration [ ]
In order to be a more effective Bard, certain items can help to recover inspiration or make inspiration notes appear more often.
| Item | Effect on Inspiration |
|---|---|
 Auto Tuner Auto Tuner | Increases maximum inspiration by 2. |
 Band Kit Band Kit | 8% increased inspiration regeneration rate. |
 Concert Tickets Concert Tickets | Increases maximum inspiration by 2. Every nearby ally increases your inspiration regeneration by 1%. |
 Fan Letter Fan Letter | Increases maximum inspiration by 3. |
 Headset Headset | Increases maximum inspiration by 2. |
 Marching Boots Marching Boots | While running, your inspiration regeneration is increased. |
 Pad o’ Paper Pad o’ Paper | 4% increased inspiration regeneration rate. |
 Plunger Mute Plunger Mute | 6% increased inspiration regeneration rate. |
 Straight Mute Straight Mute | 5% increased inspiration regeneration rate. |
 Crier’s Cap Crier’s Cap | 4% increased inspiration regeneration rate. |
 Crier’s Sash Crier’s Sash | 7% increased inspiration regeneration rate. |
 Crier’s Leggings Crier’s Leggings | 4% increased inspiration regeneration rate. |
 Noble’s Hat Noble’s Hat | Inspiration notes drop 5% more often and 5% increased inspiration regeneration rate. |
 Noble’s Jerkin Noble’s Jerkin | Inspiration notes drop 5% more often. |
 Noble’s Leggings Noble’s Leggings | Inspiration notes drop 5% more often. |
 Noble armor (set bonus) Noble armor (set bonus) | Inspiration notes are twice as potent. |
 Marching Band Cap Marching Band Cap | 10% increased inspiration regeneration rate. |
 Cyber Punk Headset Cyber Punk Headset | 6% increased inspiration regeneration rate. |
 Cyber Punk Suit Cyber Punk Suit | Inspiration notes drop 10% more often. |
 Ornate Jerkin Ornate Jerkin | Inspiration notes drop 10% more often. |
 Maestro’s Wig Maestro’s Wig | 12% increased inspiration regeneration rate. |
 Maestro’s Suit Maestro’s Suit | Inspiration notes drop 10% more often. |
 Shooting Star Cap Shooting Star Cap | 10% increased inspiration regeneration rate. |
 Shooting Star Shirt Shooting Star Shirt | Inspiration notes drop 10% more often. |
 Shooting Star armor (set bonus) Shooting Star armor (set bonus) | Each unique empowerment increases inspiration regeneration by 2%. |
 Soloist’s Hat Soloist’s Hat | 5% increased inspiration regeneration rate. |
 Inspirator’s Helmet Inspirator’s Helmet | 20% increased inspiration regeneration rate. Increases maximum inspiration by 5. |
 Rhapsodist’s Chest-Woofer Rhapsodist’s Chest-Woofer | Inspiration notes drop 15% more often. |
 Rhapsodist’s Boots Rhapsodist’s Boots | Increases maximum inspiration by 3. |
 Creativity Potion Creativity Potion | Inspiration notes drop 100% more often for 8 minutes. |
Restoring Inspiration [ ]
Inspiration regenerates on its own when not in use, until the player’s current maximum is reached. The rate at which it regenerates picks up speed when not in use, making it more efficient to burn all of your inspiration at once and then wait for a full recovery. This down time can be used to focus on dodging attacks and switching Bard weapons for other empowerments that may be best suited for the situation. Player movement does not impede the regeneration process allowing for constant movement with no setbacks.
There are also several items that can be used to restore inspiration: