Jump Force → Файлы
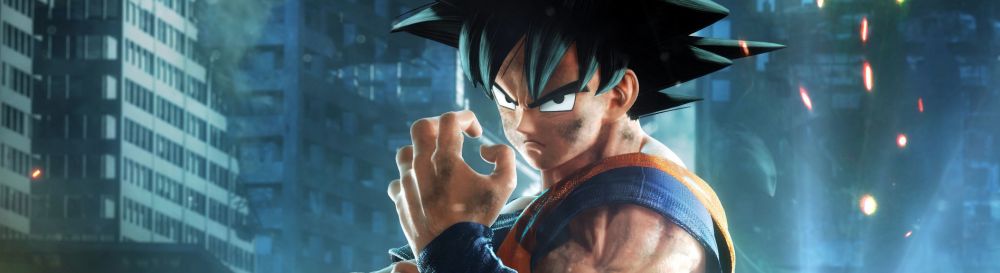
Jump Force — динамичный файтинг с видом от третьего лица, объединяющий героев из множества различных игровых вселенных, среди которых герои. Подробнее
Таблица для Cheat Engine [UPD: 23.07.2020] Jump Force

Процесс запуска:
1. Запустить Cheat Engine, «Load» и выбрать таблицу
2. «Select a process to open», выбрать нужный процесс.
3. Выбрать нужную опцию, поставить крест.
0 не понравилось 0 понравилось


Если вы хотите облегчить прохождение Jump Force, то можете воспользоваться нашим файловым архивом. Здесь собраны только проверенные и работоспособные файлы для игр, которые можно скачать бесплатно.
При скачивании файлов нужно обратить внимание на версию игры, для которой он предназначен. Трейнеры для игр, например, не всегда совместимы со всеми версиями игры, так как разработчики, выпуская обновления, могут менять архитектуру игры и принципы работы тех или иных ее механик. Обычно версия, с которой совместим файл, указывается прямо в его названии.
Jump Force → Файлы
Jump Force — динамичный файтинг с видом от третьего лица, объединяющий героев из множества различных игровых вселенных, среди которых герои. Подробнее
Трейнер / Trainer (+6) [1.00] [MrAntiFun] Jump Force

Автор: MrAntiFun
Издание: Steam
Версия Игры: 1.00
Язык Трейнера: Английский
Количество Функций: 6
Горячие клавиши и возможности трейнера:
Inf.Health — Бесконечное здоровье
Inf.Gauge — Бесконечная шкала
Inf.Money — Бесконечные деньги
Inf.SP — Бесконечные очки навыков
Mega Exp — Мега опыт
Freeze Timer — Заморозка таймера
Для отключения Easy Anti Cheat в Steam версии откройте папку с игрой и переименуйте «JUMP_FORCE.exe» в «JUMP_FORCE.exe.bak», затем скопируйте «JUMP_FORCE.exe», из архива с трейнером.
Запускайте от имени администратора.
Инструкция по установке трейнера
Как правильно распаковать файл?
Как правильно установить трейнер?
Способ установки у всех трейнеров схож и заключается в том, чтобы поместить все файлы в дистрибутив игры, в ту же папку, где находится исполняемый файл, который и отвечает за запуск игры. Иногда найти его не так уж и просто, но если у вас на рабочем столе есть иконка, с помощью которой можно запустить игру, то вы можете воспользоваться следующим способом:
1. Нажать правой кнопкой мыши на иконку;
2. В открывшемся контекстном меню выбрать опцию «Свойства»;
3. В открывшемся окне перейти на вкладку «Ярлык» и нажать на кнопку «Расположение файла».
После этого в «Проводнике» откроется папка, в которой и находится EXE-файл игры. Трейнер нужно скопировать в ту же папку, если в инструкции, приложенной к трейнеру, не сказано иначе.
После этого останется только запустить трейнер и ознакомиться с сочетаниями клавиш для активации его возможностей, а затем, не закрывая трейнер, запустить игру.
Jump Force

Вот компания какая
Проблемы становятся заметны уже в сюжетном режиме, кроме которого (помимо мультиплеера) игре предложить нечего. История рассказывает о слиянии вселенных манги и реального мира, но если не считать арены, где нашлось место и для городов вроде Парижа и Нью-Йорка, и для выдуманных локаций, то никакой упор на это в диалогах не делается. Ни забавных ситуаций или шуток, ни интересных переговоров между представителями разных вселенных — просто банальное спасение мира и попытки победить злодея.
История примитивная и скучная. В ней вроде бы есть более 40 уникальных персонажей, но всё их взаимодействие заключается в тоскливых беседах, сопровождающихся кошмарной музыкой и отвратительной анимацией. Авторы Jump Force будто не понимали, что им делать с толпой персонажей из «Наруто», One Peace и остальной манги, поэтому кое-как разбросали их по разным видеороликам (которые ещё и пропускать нельзя), а центральной звездой сделали создаваемого игроком молчаливого персонажа.
Редактор здесь неплох и предлагает немало настроек внешности, в том числе множество причёсок и даже возможность отдельно раскрашивать кончики волос. Одежды поначалу немного, но уже через несколько минут после старта «сюжетки» открывается список заданий с различными призами. За одни поручения выдаются новые приёмы, за другие — золото для покупки вещей в магазине или костюмы. Для завершения миссии нужно победить оппонента, выполняя по желанию дополнительные условия: брать определённого персонажа, совершать комбо из восьми и более ударов и так далее.
Выбор заданий (в том числе сюжетных) осуществляется в центральной локации, где при подключении к Сети удаётся встретить толпу других игроков и увидеть созданных ими героев. Всё это почему-то напомнило мне времена PlayStation Home на PS3: падающая кадровая частота, пустые коридоры, скверная графика… Когда приближаешься к игрокам, над их головами появляется значок, обозначающий возможность взаимодействовать с ними, но при нажатии кнопки ничего не происходит. А надоедливую музыку, которая включается с самого начала при каждом попадании в эту локацию, невозможно слушать уже через пару часов.

Нажми на кнопку — получишь результат
Это относится и к игровому процессу во время драк. Дело в том, что Jump Force трудно назвать файтингом в привычном понимании этого слова — она слишком проста. Видимо, расчёт был на широкую аудиторию, которой заучивать комбинации и связывать удары не захочется, поэтому разницы между четырьмя десятками персонажей нет почти никакой. Все обладают слабым и сильным ударами и выполняют одни и те же комбо при постоянном нажатии кнопки. Все одинаково уворачиваются, прыгают и ставят блок. Нет необходимости изучать меню в поисках умений — просто давите на «квадрат» и «треугольник» на DualShock 4, кем бы вы ни играли.
Разница заключается в особых приёмах, на использование которых затрачивается накапливаемая энергия. Зажав R2, вы увидите их список, а при нажатии ещё одной кнопки активируете зрелищную способность. Кто-то быстро избивает оппонента руками, не давая ему выбраться, кто-то поджигает землю — всё выглядит красиво и порой даже захватывающе. Особый сокрушительный приём совершается при нажатых R2 и X: эти моменты переполнены роскошными эффектами, мощными ударами, высокими прыжками, трансформациями — чего только нет в таких эпизодах, которые нередко длятся по 10 секунд.
Всё в Jump Force сделано на скорую руку — это явно не игра «от фанатов для фанатов», она похожа на попытку выжать из поклонников манги и аниме деньги минимальными усилиями. Возможно, на получение лицензий пришлось потратить слишком много денег, из-за чего проект кишит недоработками, но закрывать из-за этого глаза на недостатки не получается. Больше всего огорчает отношение разработчиков к сюжету — можно настаивать на том, что история в файтингах нужна в последнюю очередь, но подобный кроссовер мы вряд ли увидим в ближайшие несколько лет, а потенциал у Jump Force был огромный.

Ложка мёда в бочке дёгтя
На каждом шагу натыкаешься на недостаток, который портит впечатление. То персонажи в видеороликах стоят как столбы, то некоторые из них оказываются не озвучены. Голос главного героя игрок выбирает исключительно для его криков во время драк — в диалогах он молчит. Бои раздражают тем, что после каждого мощного удара ваш персонаж далеко отбрасывает противника, из-за чего приходится тратить время на пробежки.
Да и выглядит Jump Force, честно говоря, паршиво. Часть персонажей пережила переход из 2D в 3D не очень хорошо и напоминает пластмассовые пучеглазые фигурки со странной комплекцией и жуткими мускулами. Их будто пытались сделать одновременно «анимешными» и реалистичными, раз игра повествует о слиянии миров, но в результате получился цирк уродов.
Заодно можно упомянуть долгие загрузки, окончательно портящие впечатление от и без того проходной игры. Полминуты перед боем, полминуты после боя, при попытке открыть магазин в центральной локации приходится ждать секунд по 10, пока игра куда-то там подключается. Даже если вы перезапускаете матч, нажимая «Реванш», нужно сидеть без дела, хотя вы оказываетесь на той же самой арене с теми же персонажами. В сюжетном режиме это утомляет ещё больше — там загрузки происходят и после роликов, и до них.
Даже удивительно, что сетевой код в Jump Force оказался не так плох, как всё остальное. Никаких задержек — все матчи, которые я отыграл, прошли максимально гладко. Здесь есть и обычный, и рейтинговый режимы, так что если геймплей по какой-то причине придётся вам по душе, то проводить время в онлайне удастся не без удовольствия. Вот только поиск оппонентов занимал у меня по три или пять минут даже на низком ранге — что будет происходить на высоких, где пользователей по понятным причинам меньше, страшно представить.
Хотя я не ожидал от Jump Force ничего особенного и понимал, что продукт наверняка будет посредственным, я всё равно остался разочарованным. Так бездарно использовать столь пёстрый ростер персонажей надо было умудриться. История никакая, герои настолько безликие, что их можно перетасовать в роликах, и почти ничего не поменяется. Драки примитивные, хоть и зрелищные, а техническое исполнение оставляет желать лучшего. Возможно, если вы и ваши друзья любите аниме, в компании удастся провести пару весёлых матчей с участием Джотаро, Наруто и Сона Гоку, но надолго этого не хватит.
Плюсы: десятки знаменитых персонажей в одной игре; зрелищные спецэффекты; стабильный сетевой код.
Коды на jump force

Being a huge Shonen Jump fan, let alone an avid lover of fighting games, this game really peaked my interest. I looked at the Steam achievements and saw very low completion percentages, and I had the bright idea that I would 100% Jump Force. I checked Steam guides and didn’t see any achievement guides. I decided that when I completed the game I would make my own guide for any like minded individuals who were thinking about doing this.
Be ready for whats about to come if you choose to attempt this game.
If you can read all this and still think to yourself «Let’s Do It!». Get Help.


Jump Force’s Story Mode Consists of 9 Chapters.
Completing each chapter gives its own Achievement.
All Credit for the Story Mode Walk-through Goes to IGN who wrote an incredible walk-through here. I personally used this guide when I was working my way through the story, and I wanted to incorporate their work in my guide so that anyone who considers completing this game can have my advice and insight for achievements as well as the story walk-through so it can be a truly all in one guide
Chapter 1 is a short chapter mostly for tutorials and introductions.
After the opening cut-scene in New York, you arrive at Umbras Base which is the games main hub where you will access all the story missions or ‘Key Missions’.
To actually join a team in Jump Force, you have to speak to the leaders of Alpha, Beta, and Gamma, then return to Director Glover to make your choice.
Most of Chapter 1 consists of various combat tutorials so you can understand the incredibly complex super simple fighting tech in this game ( Dash Attack, Heavy Attack, Hold Right Trigger for a list of abilities. that’s pretty much it).
After you finish the tutorials you will be sent off on your first mission. Director Glover will send you to New York. you’ll get to choose who you bring on your team and in this match you will learn about switching and assist moves.
The final mission of Chapter 1 will take you, Goku, and Trunks to Planet Namek to fight a venom and a mind controlled Vegeta
Once the battle is over you will unlock Vegeta as a playable character for future story missions. A Final cut-scene will trigger and that concludes chapter 1
(Note: All base game characters are unlocked and playable in online and offline battles by default, unlocking characters only involves the ‘Key Missions»)
One thing I failed to realize while I completed most of the story mode in Jump Force is that you do not need to complete every ‘Key Mission’ in order to progress through the chapters. ‘Key Mission'(s) marked with a Red Exclamation mark are mandatory while missions marked with a Blue Exclamation mark are optional.
(Note: Directors Glover‘s Office is in the center of Umbras Base. go down the stairs of the entrance that doesn’t have a team logo)
Fight some Venoms, and you’ll find Gaara who’s fighting two Toguros, you jump in to help.
Kane comes down and infects Gaara and you gotta fight him to save him
After the fight you’ll get a final cut-scene and Chapter 2 is complete!
(Note: Chapter 3 is one of the longest chapters in the game, but because the story is broken into individual missions, you can take as many breaks as you need in-between missions.)
After you spend 41 hours doing the key missions you go to Team Betas base to trigger a cut-scene, then you find out that Blackbeard‘s working with the Venoms so you gotta go stop him. so you, Hancock and Luffy teleport to New York
You and Hancock take on Blackbeard
Luffy shows up and Blackbeard escapes, so you head back to Umbras Base
To unlock your next few Key Missions for this chapter, look at the exclamation points over characters heads in each of the three bases. They include:
(Note: You must talk to each of the team members listed above before you earn any additional key missions from the mission center)
Glover tells you there were signs of a mysterious individual next to Frieza’s ship.
Once you get there, you see Sanji jumping in to save a mysterious girl from a group of Venoms.
The book she holds in her hands looks suspiciously similar to the bad guys book, and once the venoms are dealt with she passes out. nothing weird here, lets bring her back to our base!
after those missions go to Beta Teams Base and see Zoro, he’ll tell you Luffy went to San Francisco and hasn’t been heard from since
Luffy’s been Cornered by Blackbeard and Frieza, you gotta help him fight back!
Once you get Luffy back to Umbras Base, go to Gamma Base and talk to Gon, He says Killua’s been missing and asks if you will help search for him.
The final showdown of Chapter 3 takes you to Mexico, fighting a group of clone Toguros, then another group of them. They aren’t too difficult.
Suddenly, Cell, Blackbeard, and Aizen show up and knock you off a cliff away from your team.
You are then forced to fight Frieza and Aizen, with no support characters. It can be pretty tough, make sure to block.
after you win, Gaara swoops in to help you take them on, you fight them once more.
And with that we conclude Chapter 3!
The First Key Mission of Chapter 4 is a reunion between Ichigo and Rukia. Director Golver welcomes you into the office and informs the three of you you gotta head to New York. Once you get there Galena uses a Dark Umbras Cube to Control Rukia and you and Ichigo need to fight her.
This fight can be tough will all her abilities doing a lot of damage so make sure you block and sidestep her freezing slash attacks. Ichigo also has long range abilities so be sure to take advantage of those.
Director Glover informs you, Gon, and Killua that Kurapikas gone missing near the Matterhorn. You go there and sure enough hes under the Venom’s Control.
you gotta fight him and Hisoka to break Kurapika out of his trance.
Glover will send you and Sanji to the base of the Matterhorn to backup Zoro and Asta, but guess what happens they evil, so uh go fight them.
Zoro has an unblockable ability, so when he spreads his leg shoulder width apart and reaches for his sword, back away because his unblockable is coming. Once you defeat them, you will return to Umbras Base with some beat up friends.
Once you return to Umbras Base, to complete Chapter 4 talk to Angela who is currently in Beta Base. This will trigger a cut-scene with some wack ass plot twists nobody anyone with eyes saw coming.
Chapter 5 is incredibly short and focuses on tracking down Sanji after he betrayed the Jump Force and lead the Venoms directly to you.
Trying to figure out what happened with Sanji you head to Mexico and find him talking to Blackbeard.
Fight Blackbeard, once you beat him he will escape through a random sky portal and the Director will call you tell you to get back to base.
Next you go to Paris and see Sanji talking to Toguro
Once he sees you, he will take off, leaving you to deal with the Toguro replica. This fight ramps up in difficulty quite a bit out of no where. Toguro can deal massive damage with just one 1 single landed ability, so the key to this fight is dodging constantly, especially taking advantage of High-Speed Counters and Dodges. To High-Speed dodge, flick the stick in any direction immediately before a punch makes contact, this will teleport you behind the enemy and allow you an opportunity to deal some free damage as they likely didn’t see that coming.
Once you defeat Toguro you will be told once again to come back to base.
Director Glover tells you Team Alpha has engaged with Frieza in New York so you go to help.
The first battle you will have to complete will be against the 3 replica Friezas. These replica’s really enjoy using Frieza’s Death Ray ability, but luckily he telegraphs that fairly obviously. Whenever the replica stops moving and raises his left arm, you have a Death Ray coming so block accordingly! The best way to deal damage during this fight is to use quicker abilities to deal damage in openings while Frieza charges his.
Now you’ve beaten his replicas its time to fight the man himself. the fight plays out almost the exact same as his replicas so just watch out for his death rays.
After finding out Blackbeard Replicas are showing up around the world Light asks to talk to you privately, on his way to talk to you Light and Ryuk find Angela and Sanji
WOW BIG PLOT TWIST VERY GASP RANDOM GIRL WITH SPOOKY BOOK IS EVIL
You have saved Sanji and completed Chapter 5, but pay attention to the final cut-scene before the next chapter, as it has implications for the rest of the story. seems like we may have a real traitor inside the Jump Force.
The first Key Mission of Chapter 6 has you travelling to Paris to finish off Frieza, who then uses the Onyx Book to possess Goku and use him as cover to escape.
Fighting Goku is simpler than you may think, especially since you are able to pick the other two fighters to fight alongside you. I recommend Zoro due to his unblockable R2/RT+Triangle/Y ability. Avoid Goku’s counter ability. You will know when to avoid attacking when you see the blue electric glow around his character model.
(Note: there are also 2 simple key missions you can do prior to defeating Frieza tho they are 100% optional)
Report to the Director for your next assignment. There, Kurapika will ask you to go to Japan with him to find Hisoka and see if hes made contact with the Venoms.
Hisoka wants to play games so you gotta fight him if you wanna get any info out of him.
After the fight he pretends to be unconscious but Kurapika sees through him.
When you get back to Umbras Base the Director tells you, Rukia, and Ichigo that someone who looks like Aizen was seen in Japan so the three of you set off to see if its the real Aizen or if its just another replica.
Shocker its a fake. fight him i guess idk.
(Note: Use ichigo and Rukia’s swords in tandem to deall massive damage to the replica. Rukia’s special abilities can also be used to freeze your enemy leaving him open for devastating blows.)
You’re sent to San Francisco with Deku to investigate a venom threat. You are then ambushed by Galena, Brainwashed Zoro and Brainwashed Kenshiro.
Fight them.
(Note: watch out for Zoro’s unblockable attack and Kenshiro’s dash ability. Always stay moving when fighting them)
Kane angry wants to fight you himself.
The difficulty spike here is pretty ridiculous, so be ready for a tough fight. Kane loves to spam his Ignition Bullet move, which will teleport him infront of you dealing a devastating amount of damage if unblocked. If you do manage to block however, he will still break your block leaving you staggered and open for an attack. It is best to dodge this move when possible, even pulling off a high speed dodge if you can manage it.
(Note: There is a way you can cheese this fight once youve been KO’d by your thousandth «PLANET BREAKER bs spam» Ill throw a video for it.)
Once you manage to defeat Kane, the other Jump Force members will arrive to support you, forcing Kane to retreat and ending Chapter 6.
The beginning of Chapter 7 features a variety of Key Missions focused solely on improving the strength of your Jump Force teammates. These strength training missions as also given along side 2 optional key missions and 2 main key missions.
Starting to worry about Luffy, Sanji and Hancock travel to San Fransisco after hearing reports that someone matching Luffy’s description was causing havoc in the city.
Shocker another replica, fight him. and yes this is still considered a story mode.
With Luffy gone the other teams wonder and the chain of command if their leader were to disappear so they fight over it.
After the fight they all come to the conclusion that they are all sort of sub leaders in their own wa- what was the point of this mission?? Is this a FILLER MISSION? DID THE COMPANY JUST NEED AN EXTRA MISSION? Anyways.
Once you complete each of the mandatory Key Missions for Chapter 7, you must report to Director Glover for what he describes as the «Final Showdown». Kane and Galena have been spotted in New York and he would like you and 2 other Jump Force members (of your choosing) to travel to New York and put an end to this.
But of course you cant put an end to this without another meaningless fight first, as when you arrive you find Frieza, Hisoka, and Toguro, if you wanna get to Kane you have to fight these guys again for the 3rd time.
You might be thinking okay I’m done with these guys now let me fight Kane. NOT YET.
Once you defeat the three of them you will them have to fight a group of 3 Venoms and take them down. I’m not sure why this fight exists. It isn’t tough and just serves as another fight for no reason other than it is there.
Once you beat those annoying Venoms, you can finally face off against Kane for a final time. His move-set is the exact same you saw in the previous chapter, and he still loves to spam Ignition Bullet, a teleporting punch attack. Don’t worry, remember your high speed dodges and counters to stay in play.
Defeating Kane will trigger the final cut-scene.
Sike, but it will trigger a cut-scene featuring a big revelation for you and the Jump Force. Maybe Kane and Galena weren’t the ones calling the shots this whole time.
You are now in your final stretch of the Jump Force story. After the major betrayal by Prometheus(AKA Director Glover) at the end of Chapter 7, The Jump Force is now in shambles. Your only hope is to return to Umbras and search for Galena.
(Note: There are 3 Optional Missions available at the start of Chapter 8: Noise, God of Death vs Spirit, and Triple Dragon. Each missions is similar to other optional missions, offering you extra sparing sessions with your Jump force team members.)
Both of the Pursue Galena Missions are odd in structure. There are no cut-scenes before them and you simply show up at the location in the mission title and fight Galena.
And you thought this was lazy writing before. god i hope you didn’t pay full price for this game.
(Note: remember to stay mobile and take advantage of your High-Speed dodging and counters. Once you defeat Galena in each location (of course she escapes both times) you will be called to return to Umbras Base for an important update.)
Once you defeat Galena (AGAIN) Prometheus will show up. He betrays Galena, then dips through a black portal above him, hes heading to Umbras Base and setting the stage for the FINAL FIGHT.
After Prometheus destroys Galena, and disappears into Umbras, the Jump Force tries to follow only to be ambushed by a large group of venoms.
Aizen then shows up, putting the Jump Force in a very dangerous situation. Suddenly Aizen Turns on the venoms, striking two down with a single blow. He then explains he decided to join you in taking down Prometheus, because his goal will likely lead to the destruction of all Jump Worlds.
After defeating the Venoms you may then ascended to the final battle in umbras base.
For some reason, the Jump force thinks it’s a good idea to let you fight Prometheus, alone, with 0 powers.
This fight has the most intense difficulty spike in the game, a single attack from Prometheus can devastate 75% of your health. The best tips for this fight are:
constantly move. Prometheus is aggressive so he can leave openings to counter if you manage to dodge his attacks.
Blocking is a viable option as well, though most of his attacks can break your block, leaving you vulnerable to a massive counter. Some attacks can still deal around 30% damage even while you are blocking.
You can’t use any abilities, so combing your rush attacks will be the only way you can succeed.
Spam Grab (Circle/B). It may not be an honest way to win, but if you are really frustrated with the difficulty of this fight you can spam the grab command, hitting the chase command each time after the throw is complete. This should allow you to chain spam some throws.
Once Kane gives you his cube, you once again can use any of the powers you had earned and equipped throughout the Jump Force story from it’s roster of characters.
You will then fight Prometheus again, this time with your full arsenal of abilities. Use the same strategy from the first fight in combination with your returned powers and you should find this fight much easier.
Once you defeat Prometheus the final cut-scene will trigger.
You have now completed the story of Jump Force and stopped the destruction of the Jump Worlds.
Your character will be named the new director of the Jump Force and Trunks says you all still have plenty of work to do. Maybe this isn’t quite the ending we thought. looks like Light may still have a few plans for the future.
The Battle Begins:
Don’t be worried by the use of the word ‘ranked’.
As long as you go for this achievement early on, set the matchmaking level to «Similar Rank» and you’ll be put up against people who have no clue what they’re doing.
The Curtain Rises:
You can get this achievement very easily by playing with a friend and having them throw a match for you, or you can try your luck against randoms. Make sure you do this in the «Friendly Match» mode at the Online Counter.
Challenger:
You unlock this achievement by walking up to another player (not an NPC) and clicking X (Xbox) or Square (PS4/5) to bring up their profile then challenging them to a match. The problem with this achievement is you have to hope you can find 10 people who will accept your match and that alone can take way too much time. You can work around this by having a friend hop online and try to find them in your lobby. (for best results we did this late at night to increase the chances of finding each other.) Once you find your friend and challenge them, you can simply rematch them 9 more times and the achievement should pop.
Extra Missions in Jump Force are missions that give various effects when they are cleared, like breaking the Level 20 level cap. And wouldn’t you know it, there’s a mission called «Level 20 Limitbreaker» when you reach Level 20.
As you level up throughout the story there are multiple «Limitbreaker» Extra Missions so make sure whenever you see Extra Missions lit up that you check for a Limitbreaker mission and always clear them ASAP before continuing on with your key missions.
When your Avatar reaches level 100 you unlock a new subset of missions in Expert called ‘Defying Limits.’ There are 14 of these missions and they provide you with increasing amounts of exp and gold (S-rank rewards are generic clothes you can buy).
‘Defying Limits 1’ starts with 4,500 gold and it ends with ‘Defying Limits 14’ which gives you 24,000 gold.
That’s not a typo, 24,000 gold per run.
Just Getting Warmed Up!:
This achievement will pop naturally early on.
Hitting level 10 is very easy.
Aim for the Top:
This achievement will happen naturally as well but later on in the game (most likely post story mode)
Once you reach Hard/Very Hard Free Missions you should be close. Focus on ‘Level Training Missions’.
Unite:
Just like «Just Getting Warmed Up!» this achievement will happen very early on. You don’t need to play 10 characters to get them to level up as all support characters on your roster will passively gain exp when you level up your main team.
Reliable Companions:
Just like «Aim for the Top» This achievement will happen naturally as well but later on in the game (most likely post story mode)
Once you reach Hard/Very Hard Free Missions you should be close. Focus on ‘Level Training Missions’. Your Support Characters will always passively gain exp when you and your main team level up.
Upgrade Apprentice:
Once you have a bit of gold and have some upgrade items go to the Upgrade Counter.
Upgrade either an Ability Skill or a J-Skill once and the achievement should pop.
Upgrade Master:
You will get this achievement later on.
The fastest way to upgrade 50 times is once you unlock a bunch of J-Skills and Ability Skills, level all of them up at least once. If you don’t have enough upgrade materials grind «Upgrading 1» (Expert).
Upgrade either an Ability Skill or a J-Skill 50 times and the achievement should pop.
Fashion Master:
This achievement comes after a while and does not need to be grind-ed. At random times throughout my play through I purchased Avatar Outfit Parts just for fun. You can also obtain them through specific Free Missions «Costume Hunting».
Obtain 50 Avatar Outfit Parts and the achievement should pop.
Master of Titles:
Character Specific Titles are earned playing as certain characters in online matches. you earn a title for playing each character. With the huge roster you can get the majority of the titles for this achievement. There are also Action Specific Titles (Awaken in an online match,Use an Awakened Ability in an online match, Perform one Escape Counter in online matches, etc.)
Earn 50 Titles and the achievement should pop.
Ability Master:
Abilities can be obtained through specific Free Missions called «The Art of Abilities».
You can also purchase them at the Shop Counter
(3,000 Gold / Regular Ability or 7,000 Gold / Ultimate Ability)
The fastest way to get them is by purchasing them.
Obtain/Purchase 50 Abilities and the achievement should pop.
Ability Skill Master:
Ability Skills can be obtained through specific Free Missions called «Ability Skill Expedition».
Getting these on a harder difficulty (Very Hard/Expert) will make getting this achievement a lot easier.
Obtain 30 Ability Skills and the achievement should pop.
J-Skill Master:
J-Skills can be obtained through specific Free Missions.
Simply hit LB or RB (L1 or L2) and complete the missions under the «J-Skill» Category.
Obtain 50 J-Skills and the achievement should pop.
Support Skill Master:
You get SP for acquiring Support Skills when you level up your support characters (any character that’s not your Avatar) after you play through the story and free missions for a while, your Support Characters will have all leveled up naturally and going into your menu and clicking support skills will prompt a list of all your support characters with their individual SP value beside their name. open up each characters support skills and spend as many as you can (bring the number as close to 0 as possible for each character) Each time you spend SP in the Support Skills menu you obtain a new support skill. Obtain 50 Support skills and this achievement should pop, most likely while completing «Bonds of Friendship» and «The Fruits of Friendship».
Did Something Nice Happen?:
This achievement should pop naturally while completing free missions early on.
You can see how many items each mission can drop by hovering over the missions and clicking Square (Ps4/5) or X (Xbox)
Lucky Star:
This should be your last achievement.
Once you’ve unlocked all the other achievements, you should be really close to getting this one. The fastest way to obtain your last dropped items is to farm the «Upgrading 1» Expert mission. It rewards you with around 50 items each time. No need to S rank it, so just play normally. Use a boosting item if needed (I used the one that boosts attack by 20%).
You should be able to get the achievement in less than an hour with this mission.
(Note: I encountered a rare issue when completing the «Upgrading» missions where as soon as the match would end there would be a pop up «an error has occurred» and it would send me to the main menu. I’ve only found one other person who encountered the same issue but if you encounter it I found that by starting the game in offline mode will stop this error from happening)
King of Coin:
This should be one of your last achievements.
Grind to level 100 using ‘Level Training 1‘. It should take you about 50 times to hit 100 and you’ll still get 2,600 gold per run so it’s not a waste.
Now, when your Avatar reaches level 100 you unlock a new subset of missions in Expert called ‘Defying Limits.’ There are 14 of these missions and they provide you with increasing amounts of exp and gold (S-rank rewards are generic clothes you can buy).
‘Defying Limits 1’ starts with 4,500 gold and it ends with ‘Defying Limits 14’ which gives you 24,000 gold.
That’s not a typo, 24,000 gold per run.
assuming that you have some starting money (300,000 since this is Expert after all)
even if you have to do Level Training 1 50 times to hit level 100 (still getting 2,600 gold per run for 100,000) it would take you 30 runs to get over 700,000 gold.
Contributor:
As soon as you finish Defying Limits 14 for the last time to unlock «King of Coin«, head over to the shop counter, Start buying large quantities of one use items (buy the ones that cost 1000 gold each) you can buy x999 of them so just spend all of your money and the achievement will eventually pop.
Bonds of Friendship:
You get SP for acquiring Support Skills when you level up your support characters (any character that’s not your Avatar) after you play through the story and free missions for a while, your Support Characters will have all leveled up naturally and going into your menu and clicking support skills will prompt a list of all your support characters with their individual SP value beside their name. open up each characters support skills and spend as many as you can (bring the number as close to 0 as possible for each character) Spend 500 SP
The Fruits of Friendship:
You get SP for acquiring Support Skills when you level up your support characters (any character that’s not your Avatar) after you play through the story and free missions for a while, your Support Characters will have all leveled up naturally and going into your menu and clicking support skills will prompt a list of all your support characters with their individual SP value beside their name. open up each characters support skills and spend as many as you can (bring the number as close to 0 as possible for each character) Spend 1000 SP
Building an Army:
This achievement takes like 2 seconds to unlock. Walk up to the Online Counter and choose register team. Fill out all 9 slots with random characters. This doesn’t effect the game in any way so it doesn’t matter who you pick. As soon as all 9 slots are filled the achievement will pop.
This Party Is Just Getting Started!:
When in the main lobby (Umbras Base) hold L1 (LB on Xbox) and you should see an emote wheel pop up. Simply emote 10 times and the achievement will pop.
Fanfare:
When in the main lobby (Umbras Base) hold L1 (LB on Xbox) and you should see an emote wheel pop up. Simply emote 100 times and the achievement will pop. Just watch some YouTube or something while you do it it will take like 6-7 Min.